RSS

News & Blog

Cut Off Wheels vs. Grinding Wheels: What's the Difference? Which should you use?

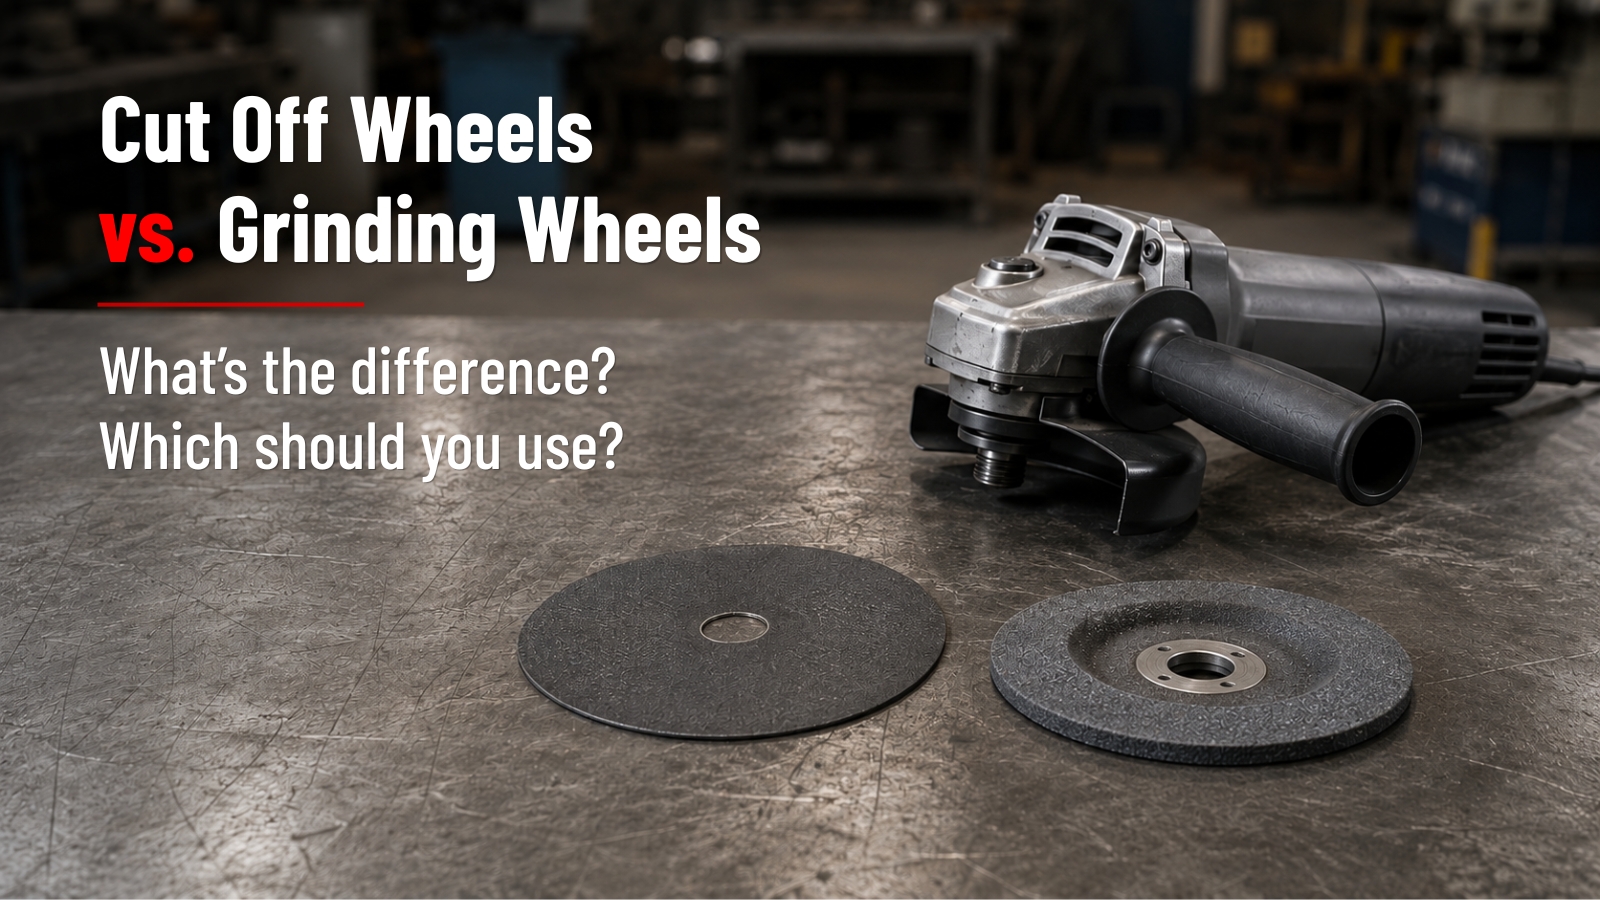
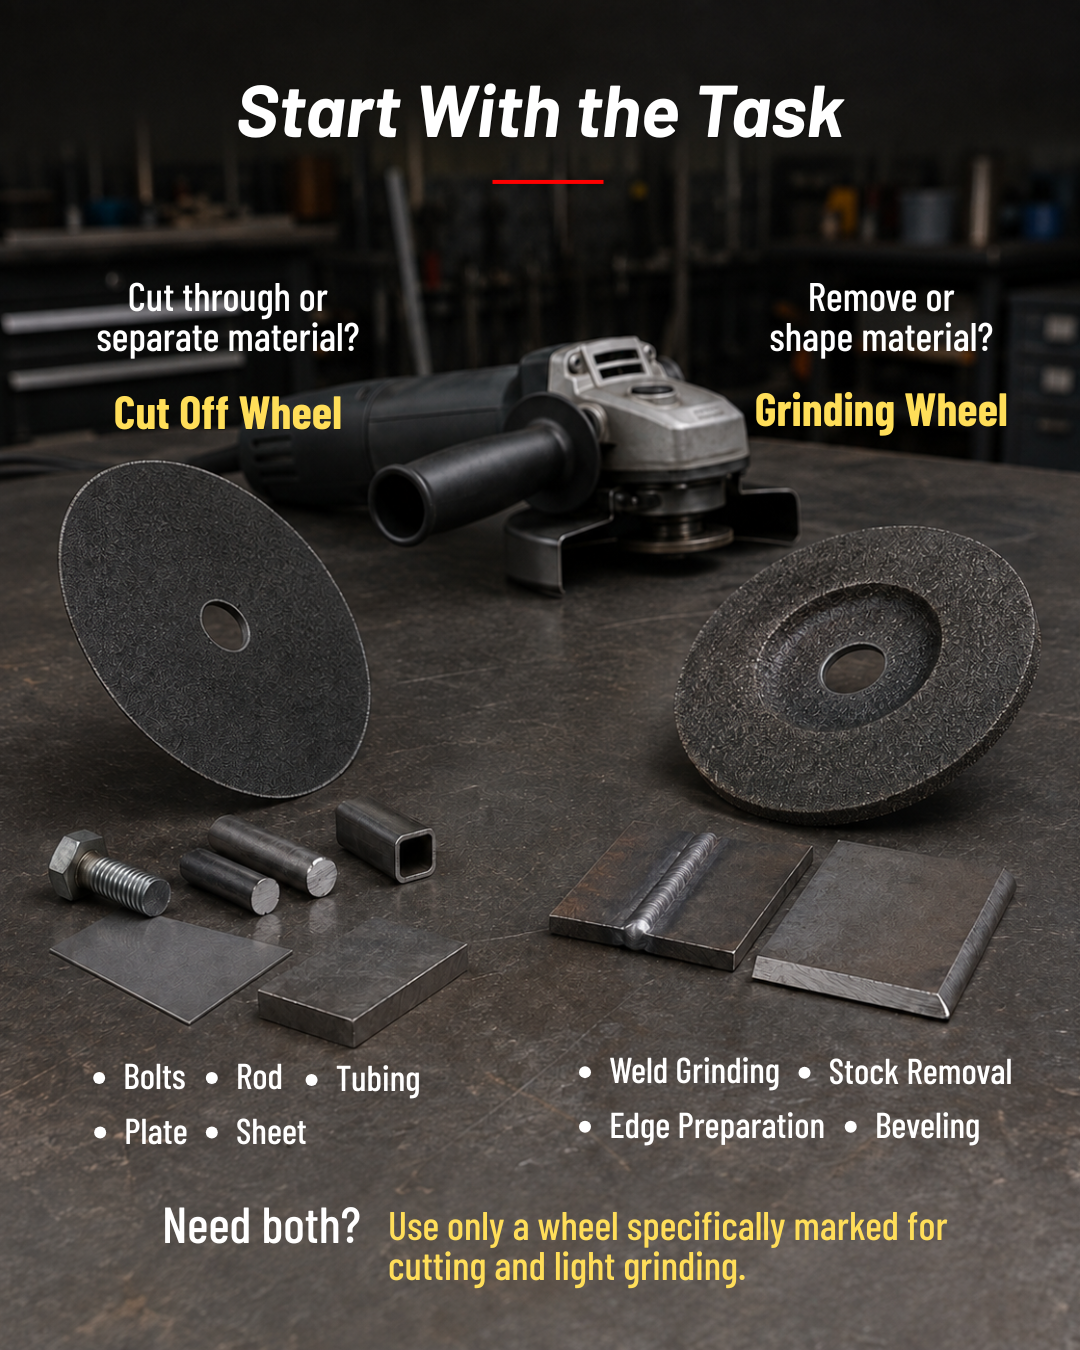
Cut off wheels and grinding wheels are designed for different tasks. A cut off wheel separates material using its outer edge, or periphery. A grinding wheel removes or shapes material using the grinding surface designated for that wheel. Standard cutting-only and grinding-only wheels are not interchangeable.

That distinction is especially important in welding and fabrication, where one job may involve cutting material, removing a weld, shaping an edge, or preparing a bevel. Start with the task, then verify the wheel’s markings, dimensions, arbor, workpiece compatibility, maximum operating speed, tool compatibility, and required guard.


Cut Off Wheels vs. Grinding Wheels at a Glance


Selection Factor

Cut Off Wheel

Grinding Wheel

Primary job

 Cutting through or separating material

 Removing or shaping material

Intended contact surface

 The outer edge, also called the periphery

 The grinding surface designated for that wheel

Typical profile

 Thin by design

 Conventional stock-removal wheels are typically   thicker

Common applications

 Cutting bolts, rod, tubing, sheet, or plate

 Stock removal, weld grinding, shaping, edge   preparation, and beveling

Important limitation

 A cutting-only wheel shoud not be used for side   grinding

 A grinding-only wheel should not be used for   cutting

Marked exception

 Some combination wheels permit cutting and   light grinding

 Follow the exact operations marked on the wheel


Physical differences can help distinguish the categories, but appearance and thickness alone do not determine how a wheel may be used. Different wheels can have similar dimensions, and specially marked combination wheels may permit more than one operation. The wheel markings and manufacturer instructions remain the deciding sources. (Cutting-versus-grinding guidance; wheel-label and safety-icon guidance)


What Is a Cut Off Wheel Used For?

A standard cut off wheel is designed to cut through or separate material using its periphery—the narrow outer edge of the wheel. It is not designed to remove material by pressing its flat side against the workpiece. (Cutting-versus-grinding guidance)

Common Cut Off Wheel Applications

In welding and fabrication, common cutting operations can include:

  • Cutting through bolts or threaded rod
  • Separating sections of rod
  • Cutting tubing to length
  • Making cuts in sheet material
  • Cutting sections of plate

These examples identify the type of operation, not the exact wheel required. The selected wheel must still be approved for the workpiece material and compatible with the tool being used.

Ram’s Cut Off Wheels category includes products with different diameters, thicknesses, arbor configurations, abrasive materials, maximum operating speeds, and wheel types. Those specifications must be evaluated for the individual application.


What Is a Grinding Wheel Used For?

A grinding wheel removes material using the grinding surface designated for that wheel. Instead of passing through a workpiece to separate it, the wheel is used for material-removal and shaping operations.

Common Grinding Wheel Applications

Depending on the specific wheel, common welding and fabrication operations include:

  • Removing or leveling weld material
  • Removing excess stock
  • Shaping a workpiece
  • Preparing or grinding an edge
  • Producing a bevel

Ram’s Grinding Wheels category includes conventional wheels intended for stock removal and specific wheels described for edge and bevel grinding. Not every grinding wheel is suitable for every job, so the individual wheel markings and instructions still control its approved use.

Different grinding-wheel configurations may also require different working orientations. Do not apply one operating angle or technique to every wheel. Follow the instructions for the specific wheel and tool. (Wheel-label and proper-use guidance)


Why Using the Wrong Wheel Matters

Standard cutting-only and grinding-only wheels are not interchangeable.

A cutting-only wheel is designed to cut on its outer edge - not grind on its flat side.

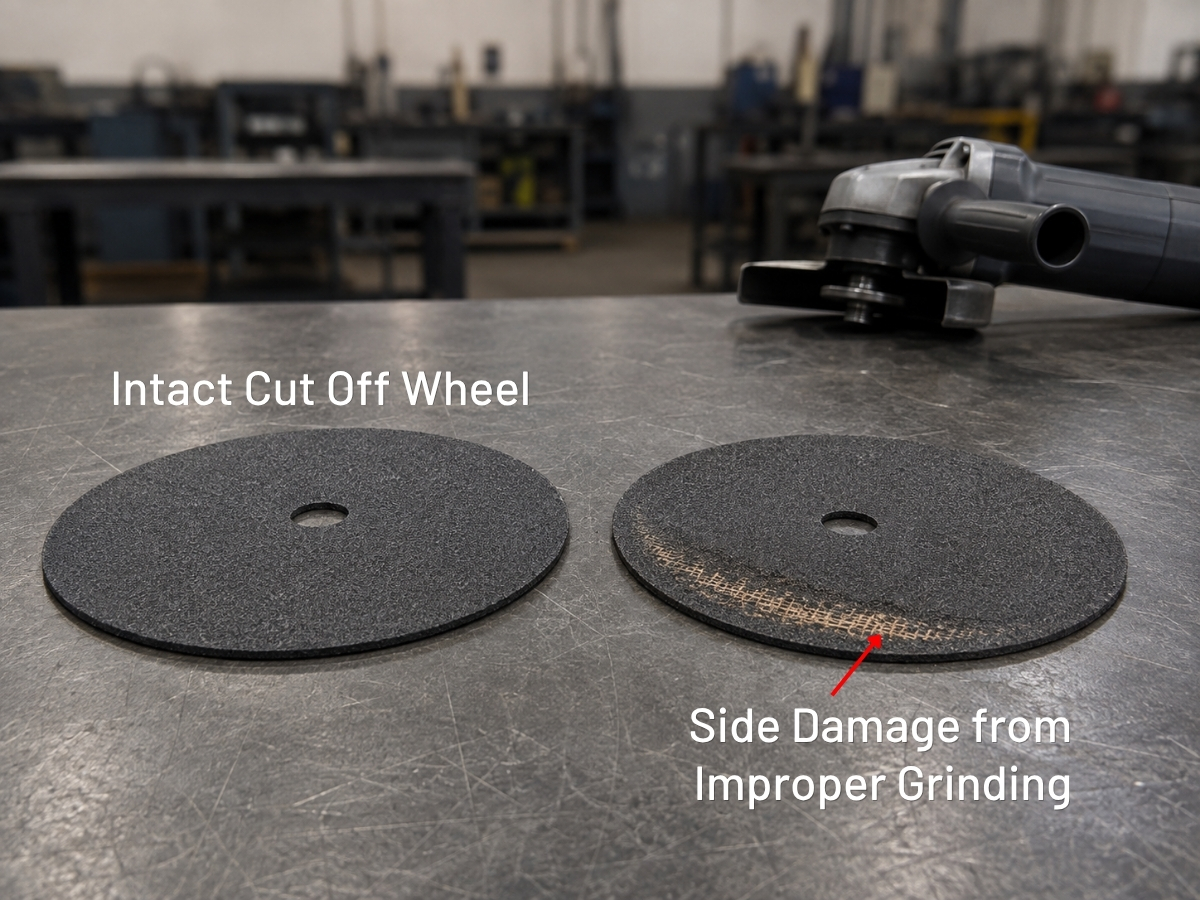
A thin cutting-only wheel does not have adequate lateral strength for side grinding. Lateral strength refers to the wheel’s ability to withstand force applied from the side. Pressing the flat face of a standard cut off wheel against the workpiece can damage its fiberglass reinforcement, reduce its strength, and lead to wheel breakage or injury. (Cutting-versus-grinding guidance)

Grinding-only wheels have restrictions as well. If a wheel is marked “No cutting” or “Side grinding only,” it should not be pushed through material as if it were a cut off wheel. Similarly, a wheel marked “No side grinding” or “Cutting only” should be used only for its intended cutting operation. (Wheel-label and safety-icon guidance)

The practical rule is simple: use the wheel only for the operations and contact surfaces identified by its markings and manufacturer instructions.


Combination Wheels Are a Marked Exception

Certain wheels are specifically designed to perform both cutting and light grinding. Ram currently lists wheels carrying that designation within its wheel categories. (Ram Products Cut Off Wheels; Ram Products Grinding Wheels)

That marking is what makes the wheel an exception. The availability of combination wheels does not mean ordinary cutting-only and grinding-only wheels can be used interchangeably.

With a combination wheel, users must still follow the operations, limitations, material compatibility, tool requirements, and safety instructions provided for that specific wheel.


How to Choose Between a Cut Off Wheel and a Grinding Wheel

The selection process should begin with the work - not the wheel's color, thickness, or general appearance.

Identify the operation first, then verify the wheel, workpiece, and tool specifications.

1. Identify the Operation

Ask what needs to happen to the workpiece:

  • To cut through or separate material, begin with the cut off wheel category.
  • To remove material, grind a weld, shape a surface, prepare an edge, or produce a bevel, begin with the grinding wheel category.
  • To perform both cutting and light grinding, select only a wheel specifically marked for both operations.

This identifies the appropriate category. It does not complete the selection.

2. Read the Wheel Markings

Confirm whether the wheel is marked for cutting, grinding, or a combination of operations. Review its restrictions and safety icons before use.

Do not rely on the wheel type number alone. Ram’s current product categories include Type 27 configurations among both Cut Off Wheels and Grinding Wheels. The full wheel markings and product instructions are therefore more informative than the type number by itself.

3. Verify Workpiece Compatibility

Check that the wheel is approved for the material being cut or ground. Material compatibility should come from the individual wheel’s markings, product documentation, or manufacturer instructions—not assumptions based on its color, thickness, or abrasive grain.

4. Match the Wheel to the Tool

Verify the following before mounting the wheel:

  • Approved operation
  • Wheel type
  • Diameter
  • Thickness
  • Arbor size
  • Workpiece compatibility
  • Maximum operating speed
  • Tool compatibility
  • Required guard

The arbor hole is the wheel’s center opening that fits over or connects to the tool spindle. Confirm that the wheel is designed for the tool and that it fits the spindle as intended. Federal portable abrasive-wheel requirements state that grinding wheels must fit freely on the spindle. (29 CFR 1910.243)

The wheel’s maximum operating speed must meet or exceed the tool’s maximum operating speed. Before mounting, compare the marked wheel rating with the tool or machine rating. (29 CFR 1910.243; angle-grinder safety guidance)

Physical fit alone does not establish compatibility. Use only a wheel designed for the selected handheld angle grinder or guarded cut-off tool, and follow the wheel and tool manufacturers’ instructions.

5. Verify the Guard and Tool Controls

The wheel must be used with the guard specified for the wheel and tool combination. For right-angle and vertical portable grinders, federal requirements state that the guard must be positioned between the operator and the wheel during use. (29 CFR 1910.243)

For a handheld angle grinder, the side handle should also be installed and used. Manufacturer guidance identifies the guard and side handle as important parts of maintaining protection and control during operation. (Angle-grinder safety guidance)

Do not modify a tool or guard to accept a wheel for which the equipment was not designed.


A Brief Pre-Use Safety Check

Wheel selection is only one part of abrasive-wheel safety. Before beginning work:

  • Inspect the wheel for visible damage before mounting it, and do not use a damaged wheel.
  • Confirm that the wheel is approved for the operation and workpiece.
  • Compare the wheel's maximum operating speed with the tool's maximum operating speed. 
  • Verify the wheel dimensions, arbor, tool, and guard compatibility.
  • Make sure the required guard is installed; for an angle grinder, install and use the side handle.
  • Wear the personal protective equipment required for the task and workplace.
  • Follow the wheel markings, tool instructions, manufacturer guidance, workplace procedures, and applicable training.

Federal requirements address inspection, spindle-speed compatibility, arbor fit, and guarding for portable abrasive-wheel tools. Manufacturer guidance provides additional instructions for specific wheels and tools. (29 CFR 1910.243; wheel-label and safety-icon guidance)

This overview does not replace manufacturer instructions, workplace training, or the safety requirements that apply to a specific operation.


Choose the Wheel for the Work

Use a cut off wheel when the task requires cutting through or separating material. Use a grinding wheel when the task requires removing, shaping, or preparing material. Use a combination wheel for more than one operation only when its markings specifically permit those uses.

Once the task is identified, verify the wheel’s markings, workpiece compatibility, dimensions, arbor, maximum operating speed, tool, and guard before beginning work.

Explore Ram Products’ selection of cut off wheels and grinding wheels.

Is Custom Kitting Right for Your Operation?


How Custom Kitting Services Improve Productivity and Simplify Operations

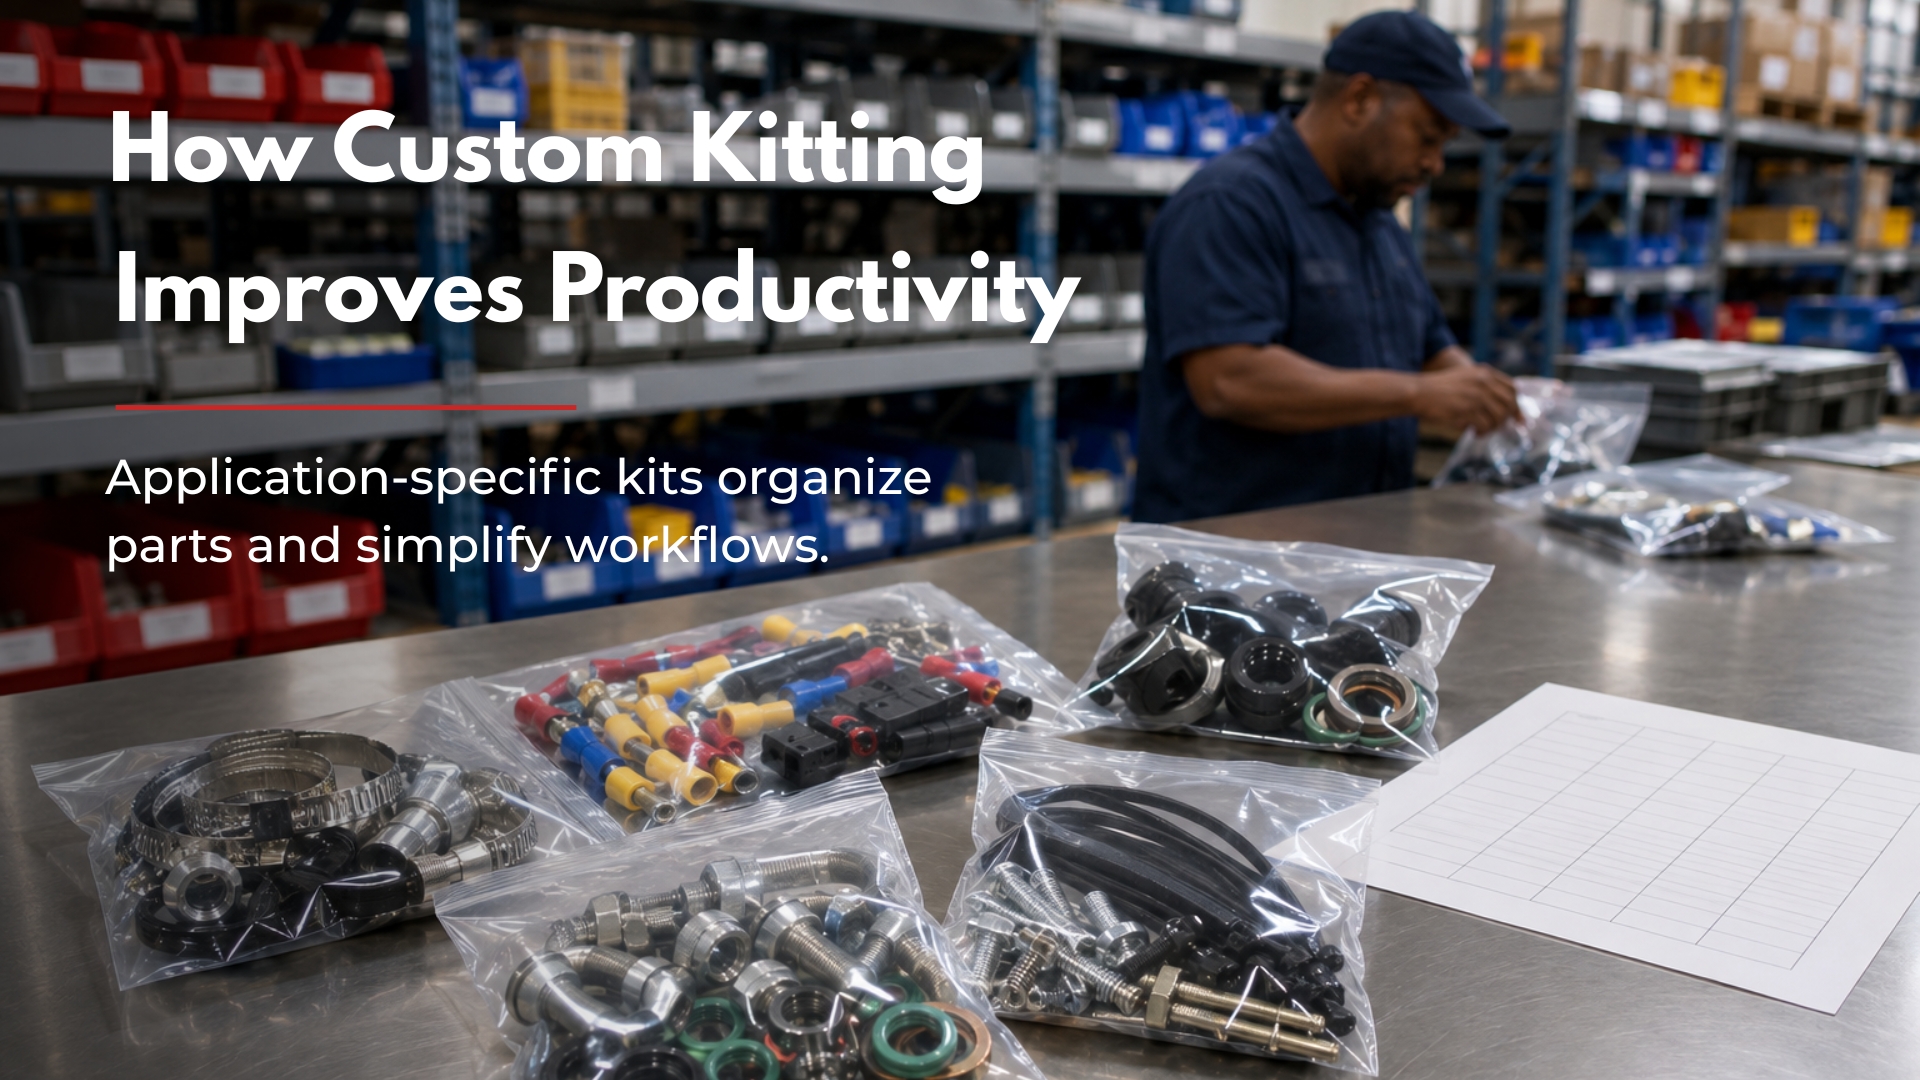
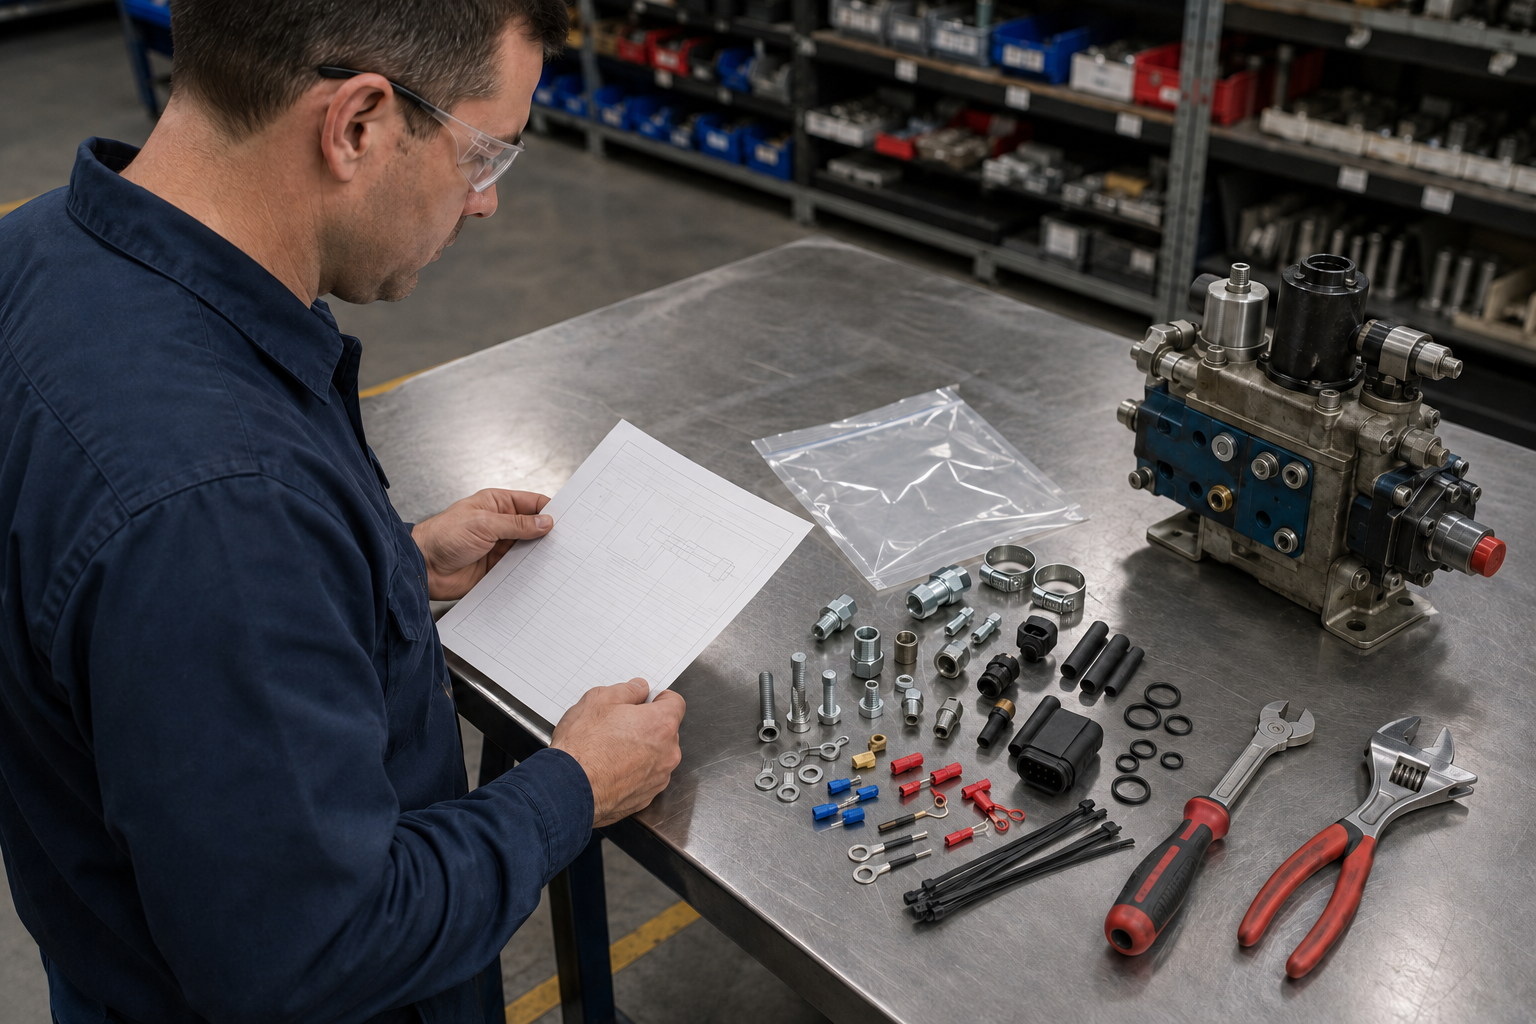
Custom kitting services organize the components required for a specific job or assembly into one application-specific package before work begins. For the right process, kitting can reduce walking, searching, and part selection at the point of use, simplify production preparation, and improve product-cost visibility. It does not eliminate preparation work; it moves that work upstream, so its value depends on the application and current material-supply process.

For maintenance, operations, and purchasing managers, that distinction matters. A kit should solve a defined preparation problem, not simply add another step. The best way to evaluate custom kitting is to understand what it does, how a kit is created, and where it may or may not improve the way your team works.

What Are Custom Kitting Services?

Custom kitting is the process of grouping a defined collection of components or subassemblies for a particular product, job, or assembly operation. The National Institute of Standards and Technology describes a kit as a collection of components or subassemblies that supports one or more assembly operations for a product or shop order. Unlike a general assortment, the contents of a custom kit are selected for an intended application and may vary with the product or configuration being assembled. (NIST, Metrics and Test Methods for Industrial Kit Building)

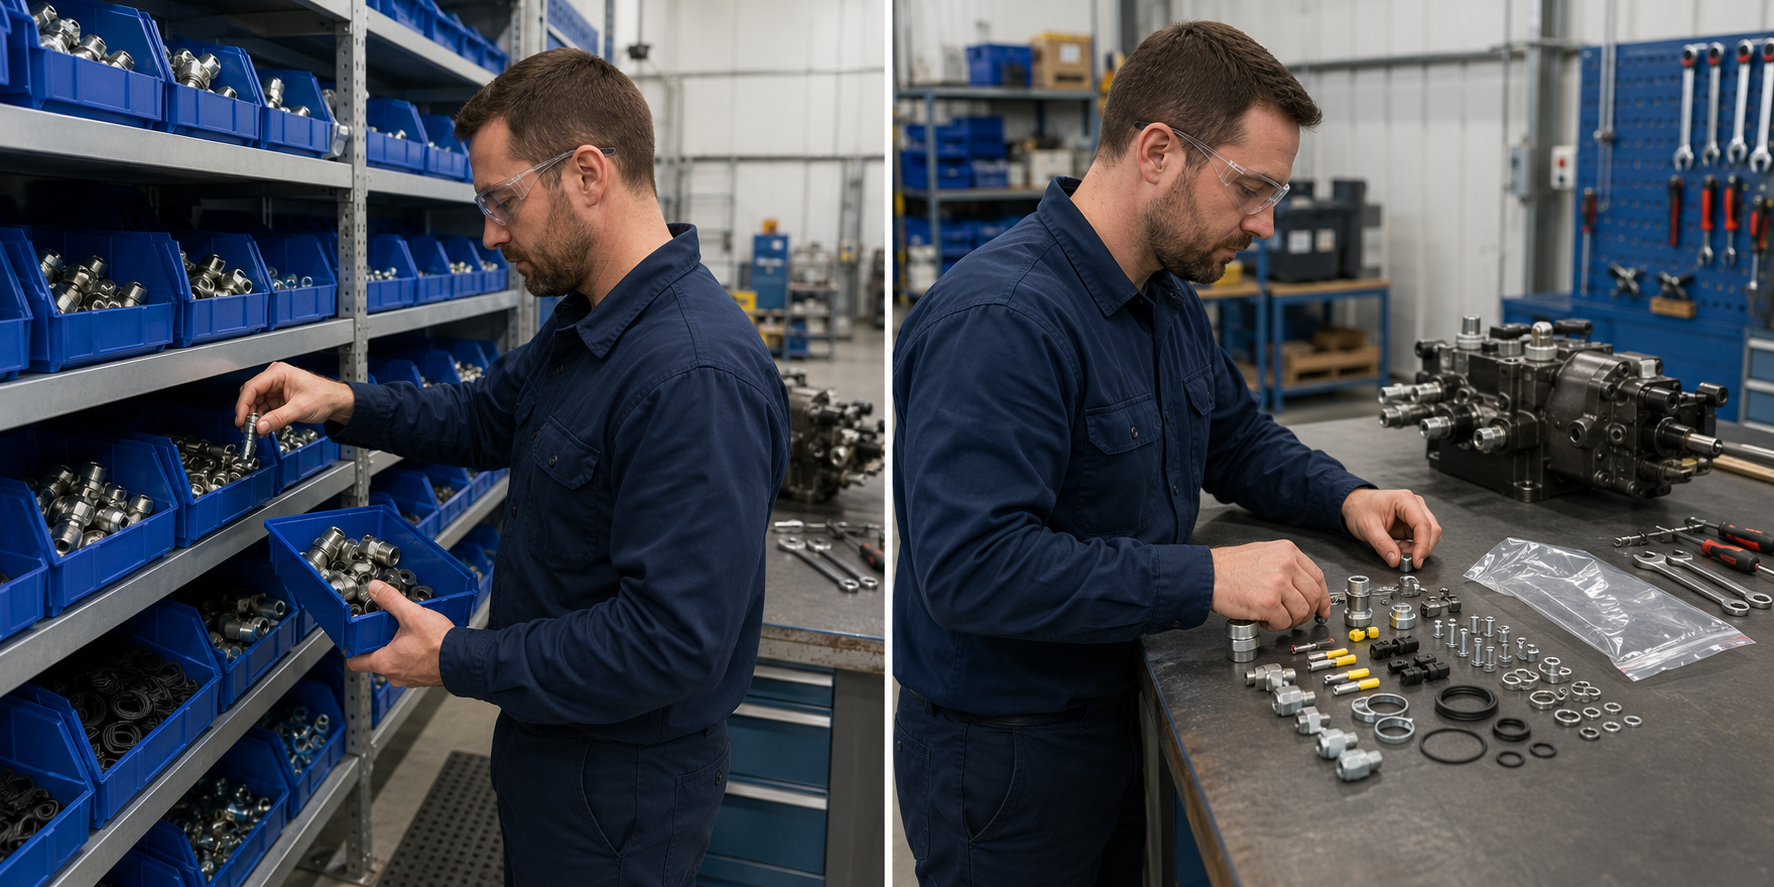
For example, a recurring maintenance task may require a defined set of fasteners, connectors, clamps, and other components. Without a kit, someone may need to locate and gather each item separately before work can begin. With a custom kit, those specified products are prepared together for the application.

This makes custom kitting both a material-supply method and a preparation strategy. The goal is not simply to place products in a package. It is to organize the required products around the work that will be performed.

The Role of the Bill of Materials

A bill of materials, commonly called a BOM, identifies the materials or components and quantities required for a product or assembly. Depending on the application, the required-materials list may also include consumables such as fasteners, adhesives, or lubricants. (NIST, Reference Architecture for Smart Manufacturing: Part 1)

The BOM gives a custom kit its structure by establishing what belongs in the kit and the quantity of each product required for the intended application.

Ram Products builds custom kits according to customer-provided requirements. A Ram Product Application Specialist can help identify needed products and suggest items that may support or improve the proposed kit. The customer ultimately approves the final contents, and Ram does not add products outside the agreed-upon BOM.

Product recommendations can support kit development, but the customer remains responsible for approving the requirements that define the kit.

How Custom Kitting Services Can Improve Productivity

The productivity opportunity comes from changing when and where preparation occurs. Instead of asking a technician or assembler to locate each product when the job starts, the specified components are selected and organized earlier in the process.

That change can simplify work at the point of use, but the complete material-supply system still matters. The preparation work must be performed accurately somewhere.

Reduce Parts Gathering at the Point of Use

Walking to storage locations, searching bins, and selecting among similar components consume time at the point of use. NIST identifies reduced walking and searching by assembly workers as potential advantages of kitting. (NIST, Metrics and Test Methods for Industrial Kit Building)

In a kitted process, part selection occurs upstream. The person performing the maintenance or assembly task receives the specified products together instead of visiting multiple storage locations. This can keep attention on the application rather than on gathering materials.

One Toyota material-handling example illustrates the tradeoff. Parts selection moved to material handlers, allowing assembly operators to remain in a smaller work area and focus on installation. Toyota estimated that the total productivity change was neutral because the system required more material handlers, and the company said the approach was not applicable to all production areas. (Lean Enterprise Institute, Toyota's New Material-Handling System Shows TPS's Flexibility)

This automotive example does not predict the result for another facility. It shows why managers should evaluate the whole process: kitting may reduce gathering work for the person completing the job while transferring that work to the people and processes preparing the kit.

Simplify Production and Maintenance Preparation

When all specified products for an application are prepared together, the kit can provide a clear starting point for the job. For a recurring task, a technician may no longer need to gather the same defined material list one item at a time. An assembler may be able to begin a defined operation with the specified components already organized.

Custom kitting may be worth evaluating when:

  • The same job or assembly is performed repeatedly.
  • One application requires multiple components from different storage locations.
  • Similar products or product variants must be selected for different configurations.
  • Parts gathering regularly interrupts the start of planned work.

These conditions do not guarantee a productivity improvement. They indicate that moving preparation upstream may reduce the number of material-selection decisions made at the point of use. (NIST, Metrics and Test Methods for Industrial Kit Building; Hanson and Medbo, Man-hour Efficiency of Manual Kit Preparation)

Improve Inventory and Product-Cost Visibility

Custom kitting can give purchasing and operations managers a clearer view of the products assigned to an application. Ram positions kitting as a way to increase transparency into product costs and support the management of labor, inventory, and storage cost of goods. (Ram Products, Custom Kitting Services)

Cost visibility is not the same as guaranteed cost reduction. Ram's public service page does not provide measured savings for these outcomes. The practical value is that Maintenance, Operations, and Purchasing can review the products for a defined application using the same agreed-upon BOM.

Support Difficult-to-Find Product Sourcing

A kit is useful only when the required products can be obtained. Ram's sourcing team uses supplier resources to locate certain difficult-to-find or non-stocked products, reducing the need for customers to search for each item independently. Ram states that it has thousands of products in stock and access to thousands more. (Ram Products, Custom Kitting Services)

Combining sourcing support with application-specific kitting may help reduce exposure to parts-related delays when a recurring job depends on products that are not easy to locate. It cannot prevent every shortage or supply-chain disruption, so product requirements and timing should be discussed before the kit is put into use.

What Custom Kitting Does Not Automatically Solve

Custom kitting can simplify preparation, but it is not an automatic productivity improvement for every process. Three limitations should be part of the decision.

First, kitting relocates work rather than making it disappear. Someone still has to pick and prepare the required components. A peer-reviewed study of 15 automotive cases found that the design and operating context of a kit-preparation system can have a decisive but complex effect on labor efficiency. The authors also caution that using only automotive cases may limit how broadly the findings can be generalized. (Hanson and Medbo, Man-hour Efficiency of Manual Kit Preparation)

Second, a kit does not make errors impossible. Research on industrial kit preparation identifies potential errors such as missing components, wrong components, damaged components, incorrect quantities, and incorrectly positioned components. The same research connects kit quality with preparation-process design. (Fager et al., Links Between Kit Quality and Kit Preparation Design)

Third, kitting is one material-supply option, not a universally superior replacement for line stocking, point-of-use storage, or replenishment. One manufacturer profiled by the Lean Enterprise Institute removed a kitting step from a high-volume process and used hourly point-of-use replenishment as part of a different production design. (Lean Enterprise Institute, Sustain Your Lean Business System with a “Golden Triangle”)

These limitations do not mean kitting is ineffective. They mean the decision should be based on the specific operation, current material flow, and problem the kit is expected to solve.

Is Custom Kitting Right for Your Operation?

Operations with repeatable applications and clearly defined preparation problems may be worth evaluating for custom kitting. Use the following questions as a starting point.

Operational signal

Question to ask

Repeated jobs or assemblies

Does the same task regularly require the same defined group of products?

Multiple required components

Must employees visit several locations or bins before work can begin?

Excessive gathering or searching

Is point-of-use preparation consuming attention that could be focused on the job?

Numerous product variants

Does each configuration require a different but predictable set of components?

Limited point-of-use space

Would delivering an application-specific quantity be more practical than storing many individual products near the work area?

Difficult-to-source products

Does the team repeatedly spend time locating required components?

Need for product-cost visibility

Would defining products at the kit or application level make internal review easier?

No single “yes” proves that kitting will produce a positive return. These questions identify processes worth evaluating. A sound review should compare the proposed kit with the time, labor, space, inventory, and controls required by the current method.

When Another Supply Method May Be Better

A separate kitting step may add limited value when a process uses only a few products, point-of-use inventory is already simple and reliable, or material requirements change too often to maintain a stable kit definition.

In some high-volume settings, frequent replenishment or line-side supply may be more practical. Conversely, a high-variety process with many component options may provide a stronger reason to evaluate kitting. The right method depends on how materials move through the specific operation. Toyota said its kitting system was not applicable to all production areas, while the Phase 2 case replaced kitting with hourly point-of-use replenishment for its redesigned process. (Toyota example; Phase 2 example)

Before selecting custom kitting, compare it with the current process and realistic alternatives. The goal is not to use kitting everywhere. It is to use the material-supply method that best supports the work.

How Ram Products Builds a Custom Kit

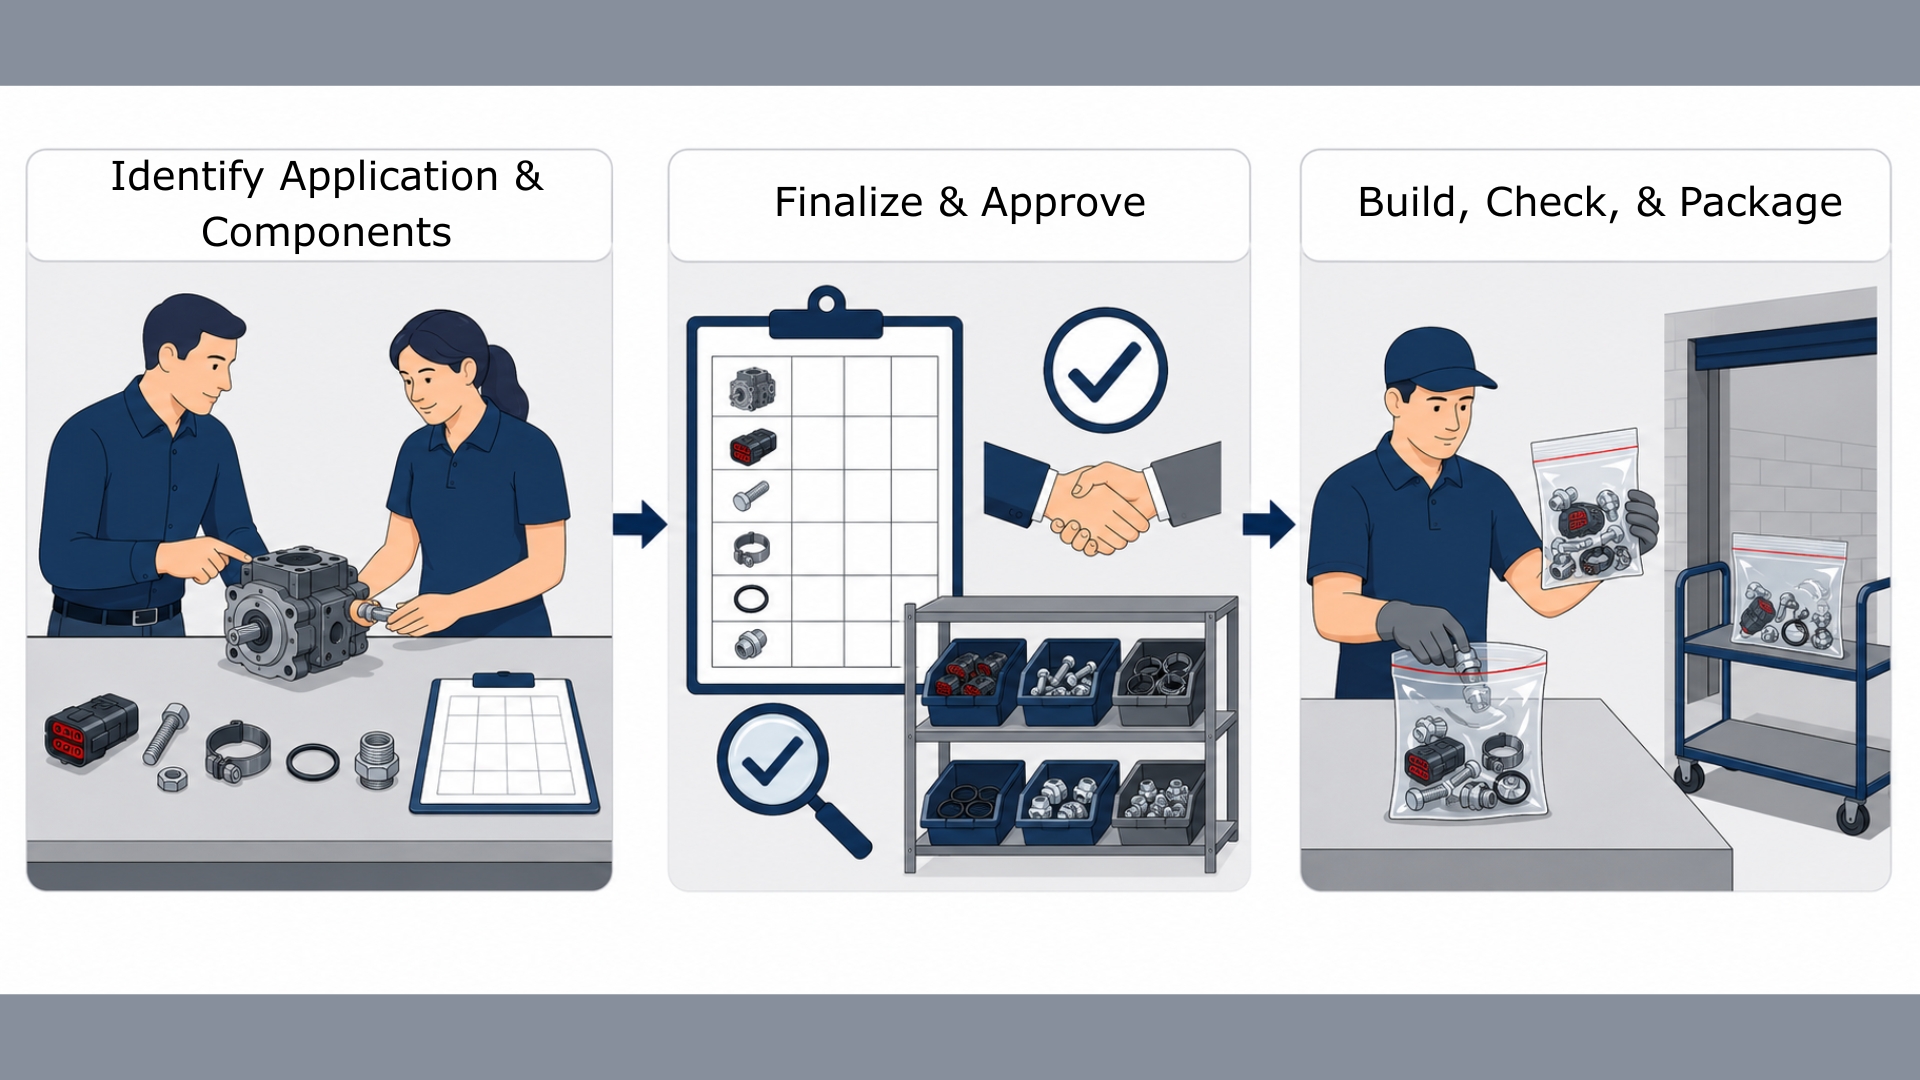
Ram Products uses a collaborative process to move from an identified application to an assembled kit. Based on Ram's confirmed process, the work follows three main stages.

1. Identify the Application and Required Products

The process begins by examining a task or production process that may benefit from custom kitting. The customer and a Ram product expert identify the products required for the proposed kit.

This discussion should begin with the work itself:

  • What application is the kit intended to support?
  • Which components must be available before that work begins?
  • Where does the current preparation process create avoidable searching, handling, or coordination?

Starting with those questions keeps the proposed kit connected to a defined operational need.

2. Finalize and Approve the Kit Contents

Once the required products have been identified, the BOM is finalized. The customer approves the final kit contents, while Ram verifies product availability. Ram has thousands of products in stock and access to thousands more, allowing its sourcing team to help locate certain products that are not currently stocked. (Ram Products, Custom Kitting Services)

The result is an agreed-upon kit specification that Ram's Operations team can follow. Ram can also revise an existing kit when the customer's requirements change.

3. Build, Check, and Package the Kit

Ram's Operations team receives the settled BOM and builds the kit to the agreed-upon specifications. The completed kit goes through a quality check before delivery.

Most Ram custom kits are packaged in sealed clear bags. When the included products are too large for a bag, a box may be used instead. The packaging format therefore depends on the products in the kit.

Kits are typically delivered to a customer's inbound receiving area, such as a parts room. In some situations, a Ram sales representative may hand off kits closer to the production line. Delivery location, timing, and lead-time expectations should be discussed for the specific program rather than assumed to apply to every customer.

What to Prepare Before Discussing a Custom Kit

A productive kitting discussion starts with clear information. Before contacting a supplier, prepare:

  1. The intended application: Identify the job, assembly, or process the kit will support.
  2. The current preparation problem: Describe where searching, gathering, availability, organization, or product visibility creates difficulty.
  3. The BOM: List the required products, quantities, and relevant specifications.
  4. Expected usage: Explain how often the kit will be needed and whether demand is consistent or variable.
  5. Approval responsibility: Identify who will review and approve the final kit contents.
  6. Receiving needs: Determine where the kits should enter the facility and who will manage them after receipt.
  7. Known changes: Flag upcoming BOM or process revisions before the kit is finalized.
  8. Timing requirements: Discuss scheduling needs directly; Ram provides lead-time information upon request.

This information helps a supplier understand both the contents of the proposed kit and the operational problem it should address. It also gives your team a clearer basis for comparing the future kitted process with the current one.

Explore Ram Products Custom Kitting Services

Custom kitting can be a practical way to organize required components before work begins, reduce parts gathering at the point of use, and improve visibility into the products assigned to a specific application. A sound evaluation starts with a defined process, an approved BOM, and a clear understanding of what the kit is expected to improve.

Ram Products works with customers to identify potential kitting applications, helps identify and source required products, assembles kits to the agreed-upon BOM, and performs a quality check before delivery. Because kitting is not the right material-supply method for every process, the first step is evaluating the application and current preparation workflow.

Learn more about Ram Products Custom Kitting Service.

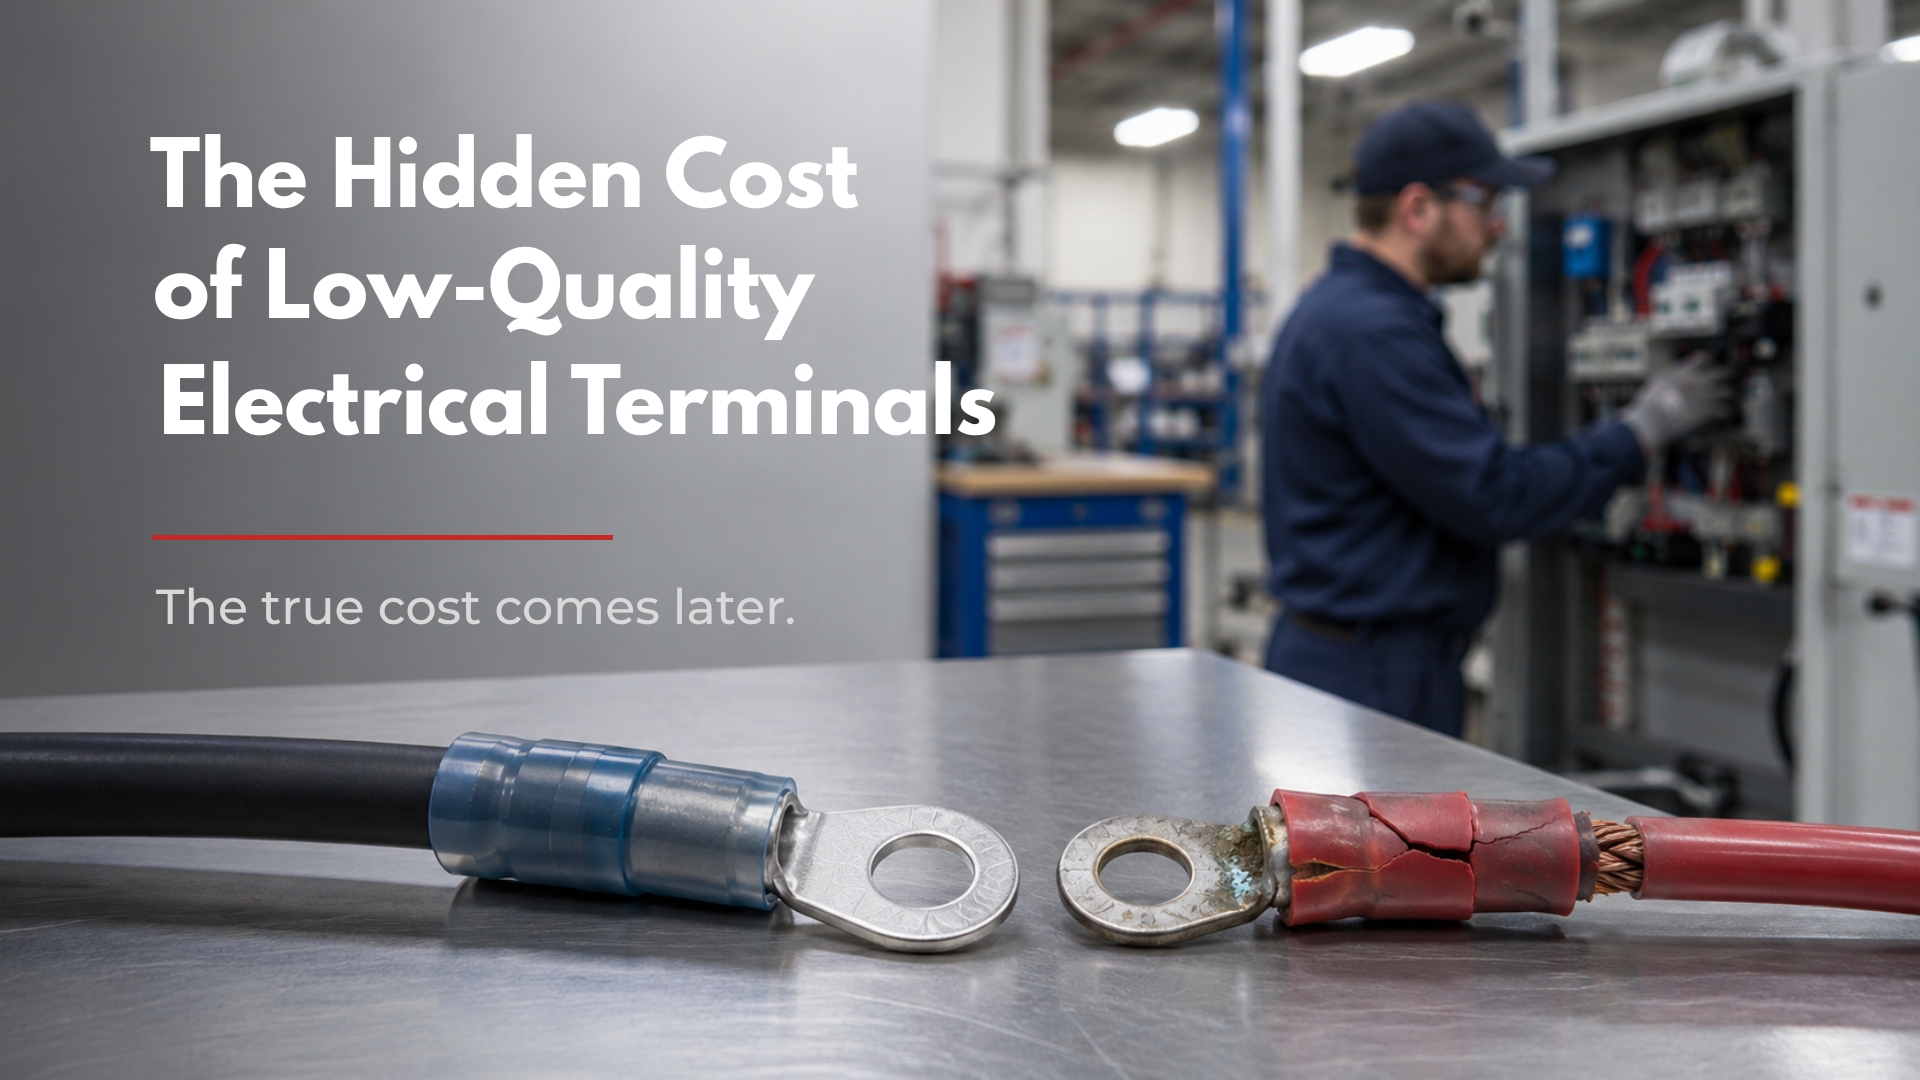
The Hidden Cost of Low-Quality Electrical Terminals

The true cost isn't measured at the checkout counter; it's measured after installation.

When purchasing electrical terminals, it's easy to focus on the price tag. After all, a ring terminal, butt connector, or spade terminal may only cost a few cents more than a lower-priced alternative. On paper, the savings can seem insignificant, or even like a smart purchasing decision.

The true cost, however, isn't what you pay at the time of purchase. It's what happens after the terminal is installaed.

A low-quality electrical terminal can create problems that aren't immediately visible. Increased electrical resistance, loose crimps, corrosion, moisture intrusion, and vibration-related failures often develop gradually over time. What began as a small cost-saving decision can eventually result in intermittent electrical issues, equipment downtime, unnecessary troubleshooting, replacement parts, or even complete system failure.

In industrial facilities, fleet maintenance shops, manufacturing opertations, and commercial vehicles, these hidden costs add up quickly. Every hour spent diagnosing a failed connection, is time that technicians aren't completing preventative maintenance or keeping equipment in service. In many cases, the labor required to locate and repair a failed terminal costs far more than the difference between a premium connector and a lower-quality alternative.

Understanding why electrical terminals fail is the first step toward preventing these costly issues. While many connectors may look nearly identical on the outside, the materials, construction, and manufacturing quality beneath the insulation can have a significant impact on their long-term performance.

Let's take a closer look at what separates quality electrical terminals from lower-cost alternatives, and why not all electrical connectors are built the same. 


Not All Electrical Connectors Are Built the Same

At first glance, many electrical terminals appear nearly identical. A ring terminal from one manufacturer may look almost the same as another sitting beside it on the shelf. The same is true for butt connectors, spade terminals, and quick disconnects. If they share the same size, color, and wire gauge, it's easy to assume they'll perform the same once installed.

The reality is that appearance tells only part of the story.

The long-term performance of an electrical terminal depends on much more than its shape. Factors such as the quality of the metal, the thickness of the crimp barrel, the type of insulation, the protective plating, and the manufacturing tolerances all influence how well a connection performs under real-world conditions. These differences may not be noticeable during installation, but they often become apparent after months or years of exposure to vibration, moisture, temperature changes, and electrical load.

Quality electrical terminals are engineered to create secure mechanical and electrical connections that remain reliable throughout the life of the equipment. Lower-quality alternatives may initially perform the same but are more likely to loosen, corrode, overheat, or fail prematurely when exposed to demanding environments.

Selecting the right terminal starts with understanding the most common types of electrical connectors and where each one performs best.

Heat Shrink Terminals

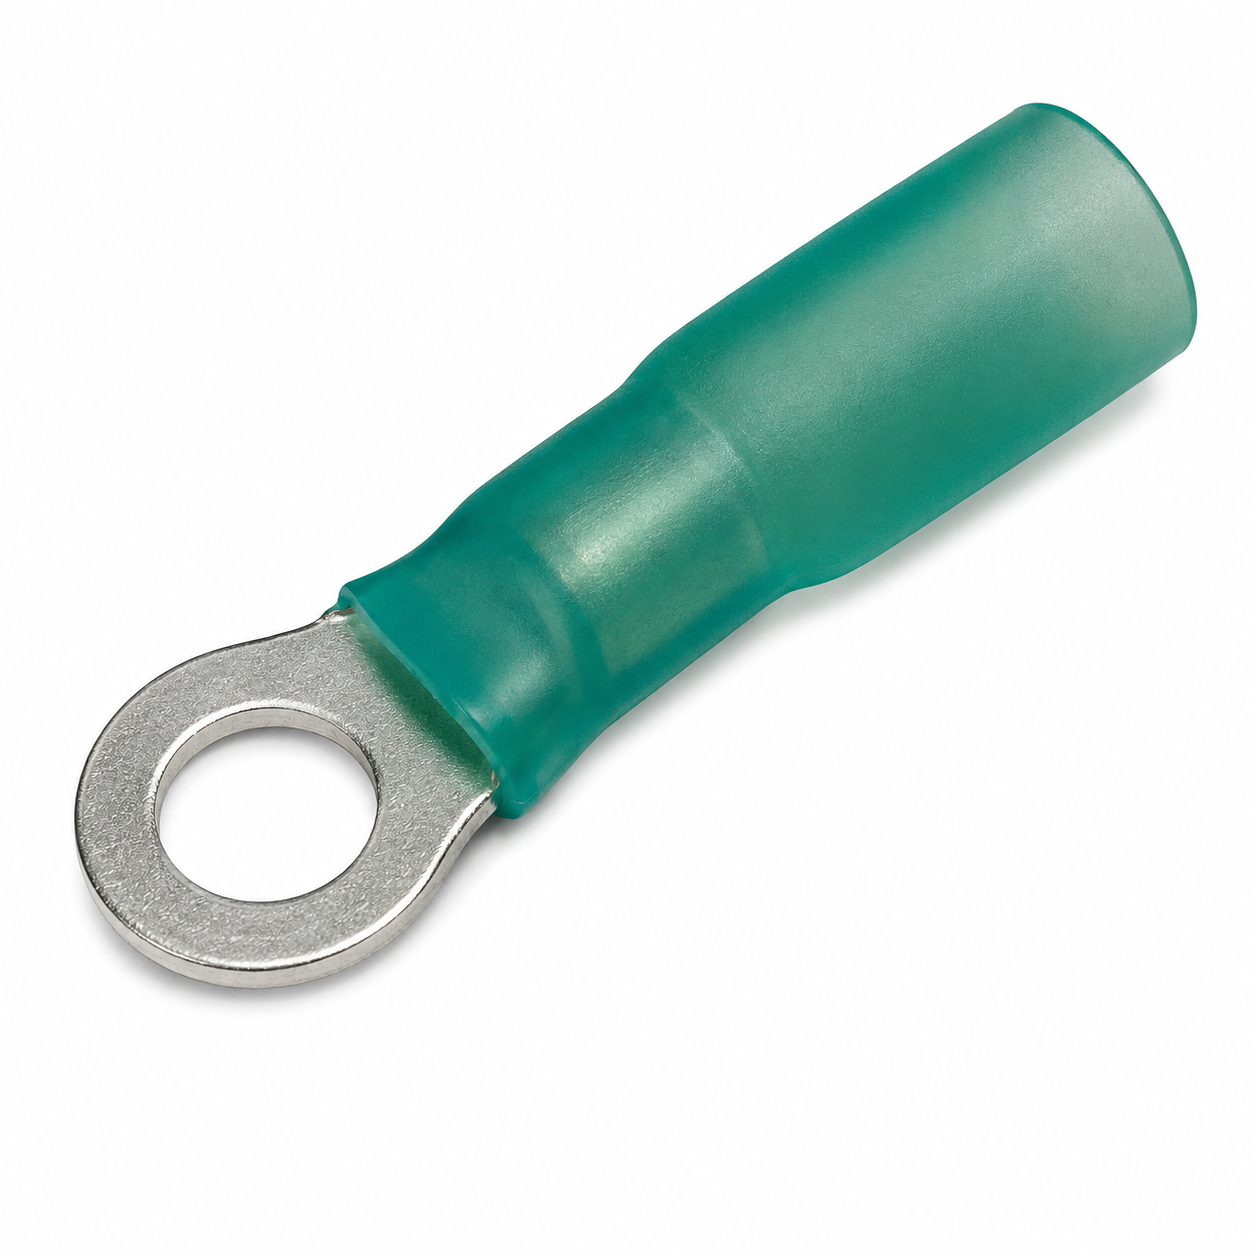
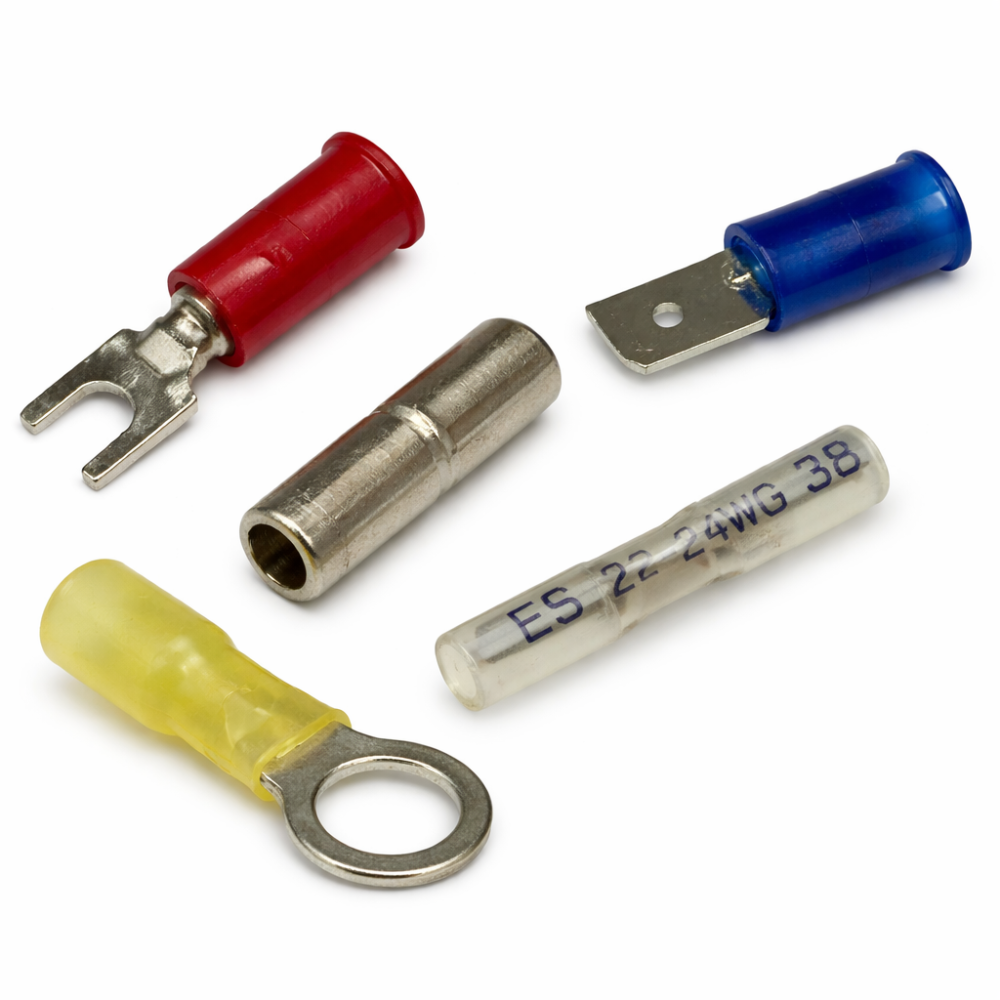
Heat shrink terminals provide the highest level of environmental protection by combining a crimped electrical connection with adhesive-lined heat shrink tubing. When heated, the tubing shrinks tightly around the wire insulation while the internal adhesive forms a seal that helps keep out moisture, dirt, road salt, chemicals, and other contaminants.

This additional protection makes heat shrink terminals an excellent choice for applications exposed to harsh environments, including fleet vehicles, trailers, marine equipment, agricultural machinery, heavy equipment, and outdoor electrical systems. In these conditions, preventing moisture intrusion is often the key to extending the life of the electrical connection.

Key Takeaway: Heat shrink terminals help protect electrical connections from the environmental conditions that commonly lead to corrosion and premature failure.

Insulated Terminals

Insulated terminals feature a molded vinyl or nylon sleeve surrounding the crimp barrel. The insulation helps reduce the risk of accidental contact with energized conductors while also providing basic strain relief during installation.

These terminals are commonly used in industrial maintenance, manufacturing, automotive repair, equipment assembly, and general electrical applications where moderate environmental protection is sufficient. Their ease of installation and wide availability make them one of the most frequently used terminal styles.

While insulated terminals provide dependable performance in many environments, the quality of both the insulation and the crimp barrel plays an important role in the long-term reliability of the connection.

Key Takeaway: Quality-insulated terminals offer consistent crimp performance and dependable electrical connections for a wide variety of everyday applications

Non-Insulated Terminals

Non-insulated terminals consist solely of the metal connector without an insulating sleeve. Although simpler in appearance, they remain a preferred choice for many professional applications where installers need maximum visibility during crimping or plan to add their own heat shrink tubing after installation.

They're commonly used in control panels, custom wire harnesses, OEM manufacturing, and high-temperature environments where specialized insulation methods are preferred.

Because the crimp barrel is fully visible, technicians can more easily inspect the quality of the crimp before the connection is placed into service.

Key Takeaway: Non-insulated terminals provide excellent crimp visibility and flexibility for applications where additional insulation or sealing will be added separately.

At installation, most electrical terminals perform exactly as you'd expect. The real test comes later—after they're exposed to vibration, moisture, temperature changes, and continuous electrical load.

That's when the differences in quality begin to matter.


What Actually Causes Electrical Terminals to Fail?

When an electrical terminal fails, the connector itself is rarely the only thing that's affected. A poor electrical connection can create excessive heat, increase resistance, allow moisture to reach the conductor, or loosen under vibration. Over time, these issues can lead to intermittent electrical problems, damaged components, unexpected downtime, and costly repairs.

According to the National Fire Protection Association (NFPA), electrical connection points are among the most likely locations for overheating to occur in a circuit, with loose or high-resistance connections being one of the most common causes.

Understanding what causes these failures can help you select the right products, improve installation quality, and extend the life of every electrical connection.

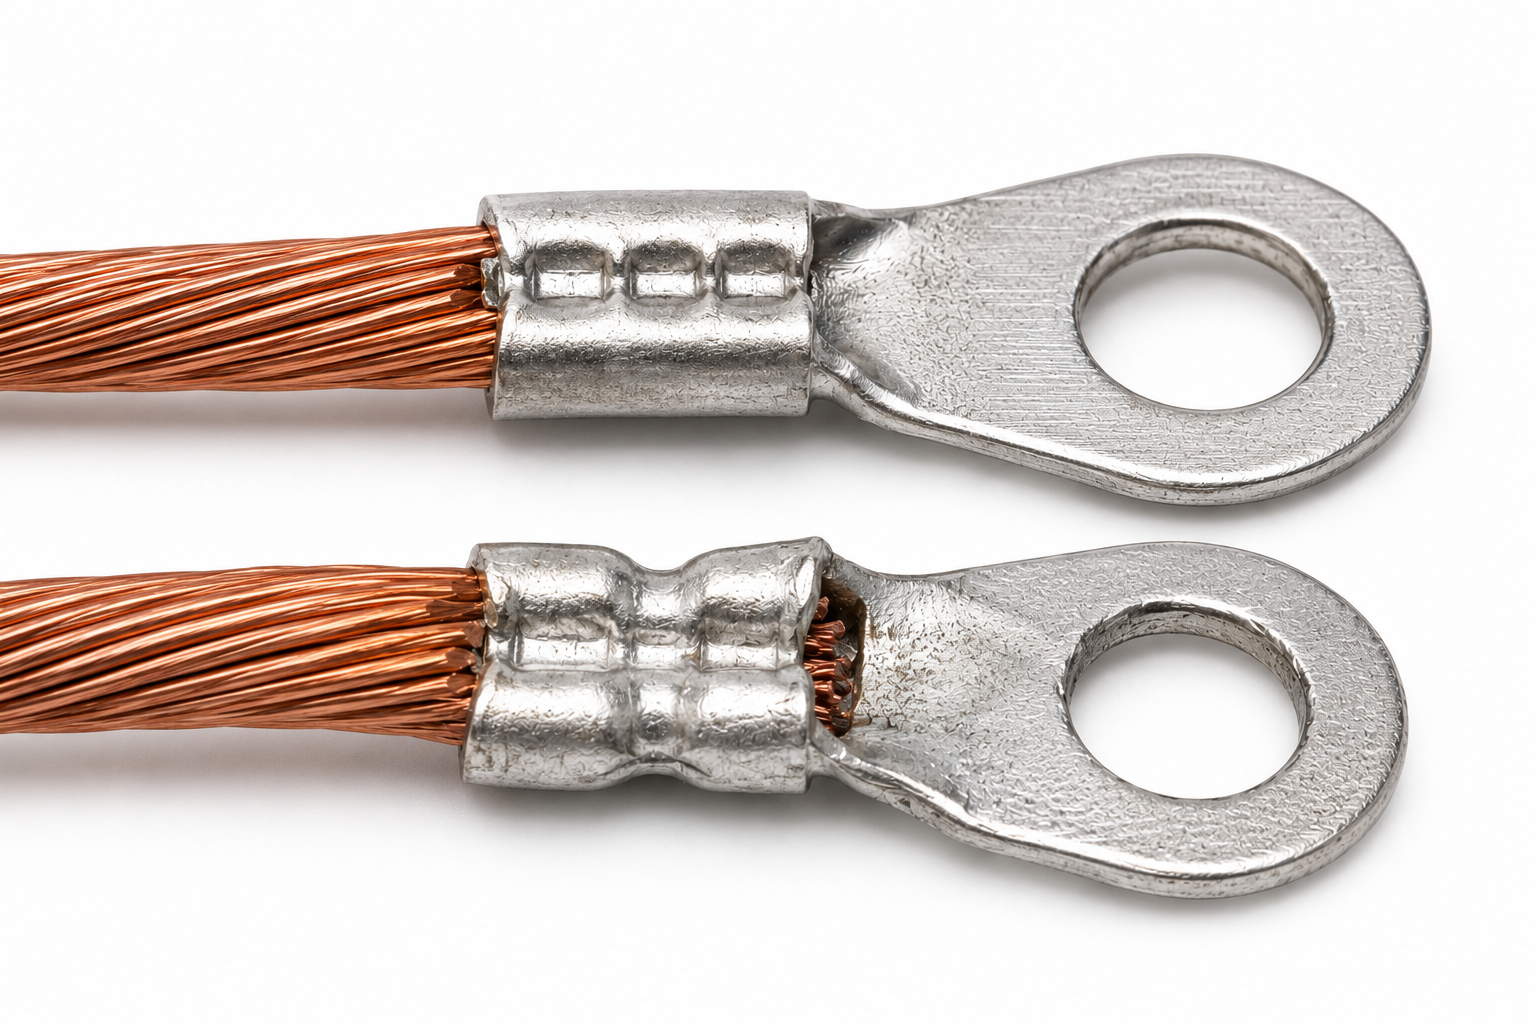
Poor Crimp Barrel Design

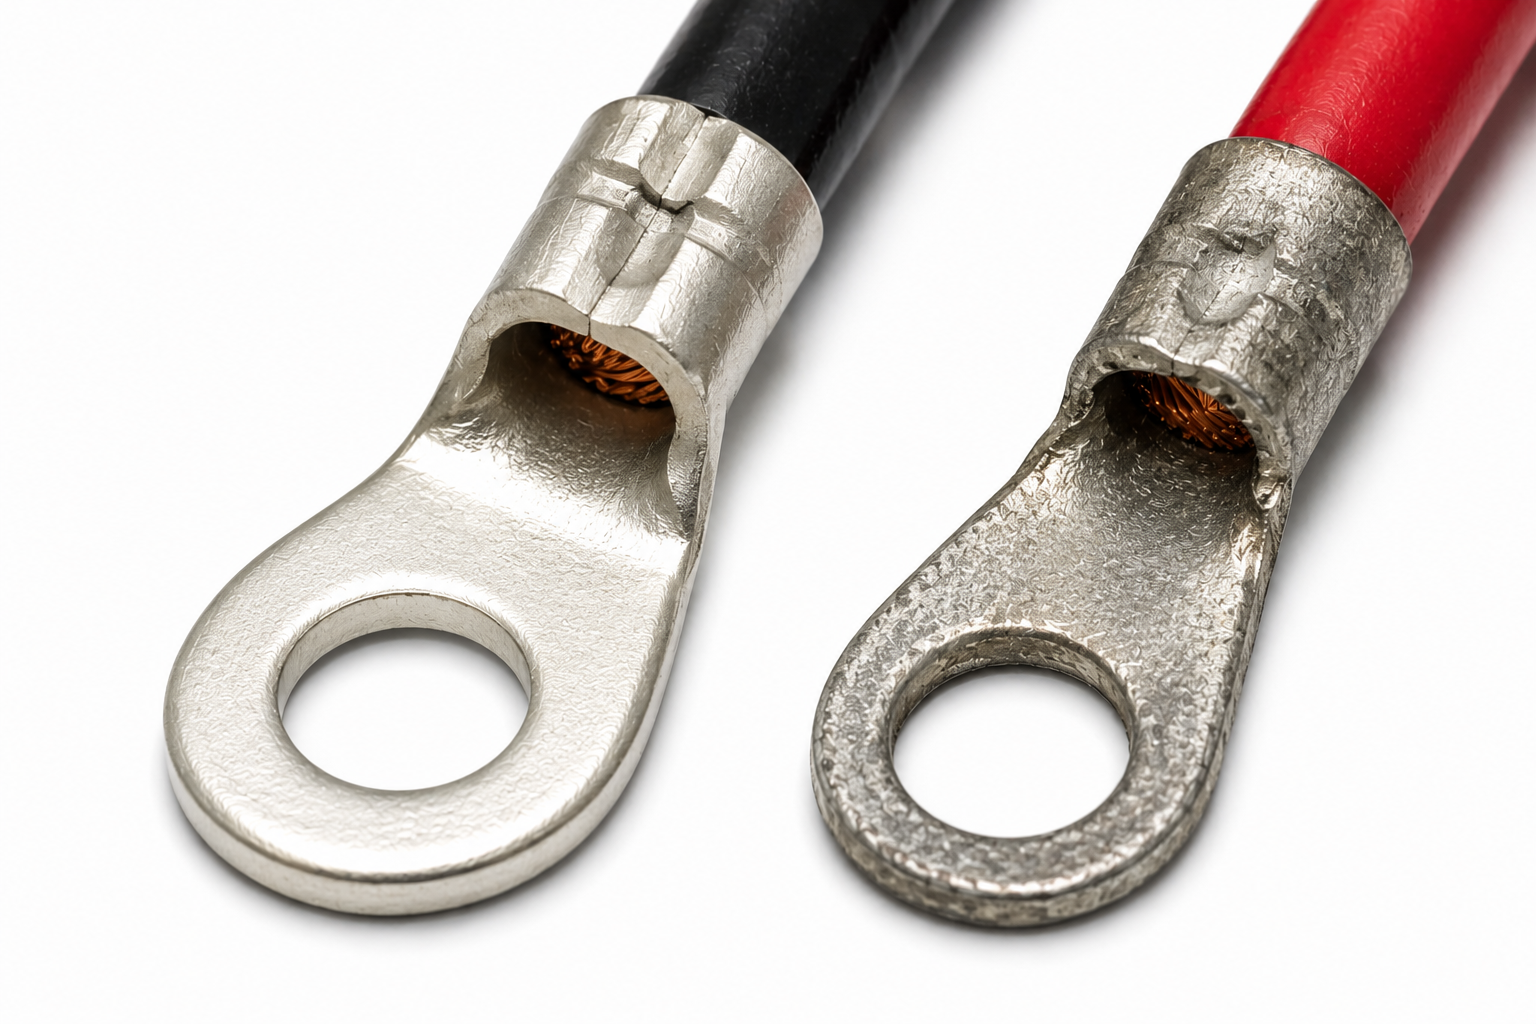
The crimp barrel is responsible for creating both the mechanical and electrical connection between the wire and the terminal. When properly manufactured, it compresses the conductor evenly to maximize contact area and create a secure connection that resists pull-out, vibration, and electrical resistance.

Lower-quality terminals often use thinner metal or inconsistent manufacturing tolerances. These variations can make it difficult to achieve a consistent crimp, even when using the correct crimping tool. Over time, the connection may loosen, increasing electrical resistance and generating heat.

A poor crimp doesn't always fail immediately. It may continue functioning for months before vibration, thermal expansion, and repeated electrical loading begin degrading the connection.
Inferior Conductive Materials

Not all electrical terminals use the same quality metal.

Premium terminals are typically manufactured from high-quality copper with durable tin plating to improve conductivity and resist corrosion. Lower-quality alternatives may use thinner metal or lower-grade alloys that increase electrical resistance and reduce long-term durability.

As resistance increases, so does heat.

Even a small amount of additional resistance concentrated at a single connection point can create localized heating that accelerates oxidation, weakens the connection, and contributes to premature failure. According to NFPA guidance, electrical connection points are among the most likely locations for overheating to occur because of loose or high-resistance connections.

Moisture Intrusion and Corrosion

Moisture is one of the most common causes of premature electrical terminal failure.

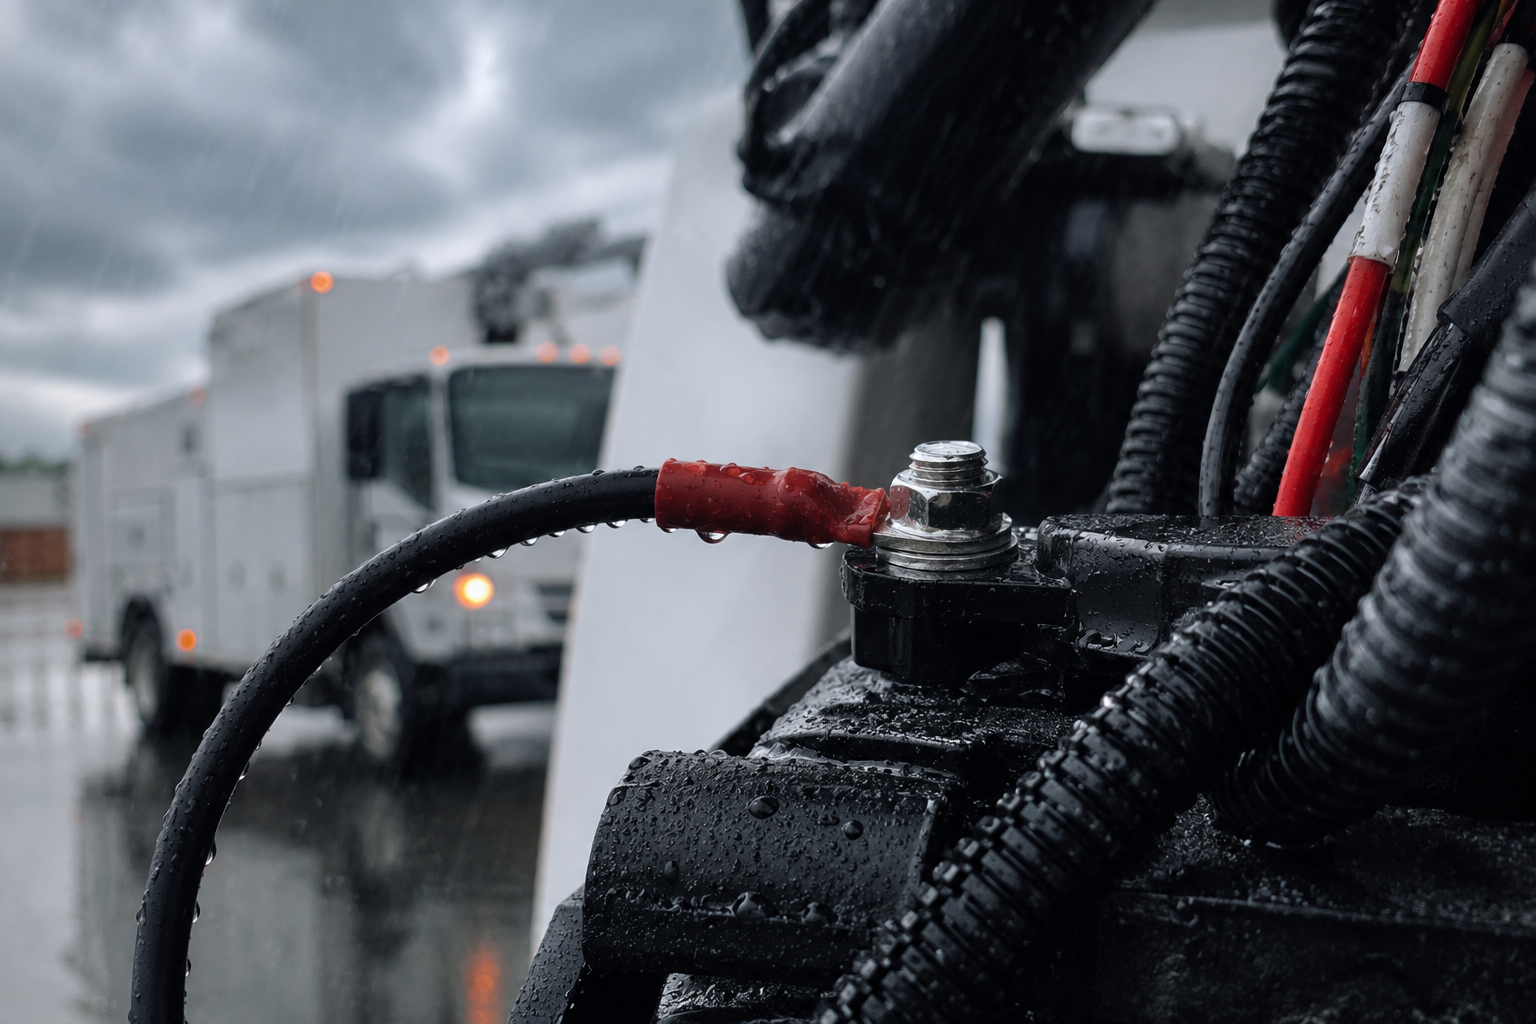
Water, humidity, road salt, fertilizers, and industrial chemicals can gradually penetrate unsealed electrical connections. Once moisture reaches the conductor, corrosion begins to develop, increasing electrical resistance while weakening the mechanical integrity of the connection.

As corrosion progresses, resistance continues to rise. This creates additional heat, which accelerates deterioration and can eventually lead to intermittent operation or complete failure.

Heat shrink terminals help minimize this risk by creating a sealed barrier around the wire and crimp barrel, reducing the opportunity for moisture and contaminants to reach the conductor.

Vibration and Mechanical Stress

Electrical systems installed on fleet vehicles, heavy equipment, agricultural machinery, trailers, and industrial equipment are constantly exposed to vibration.

Over time, repeated movement places stress on electrical connections. If a terminal is poorly crimped or manufactured from thin materials, vibration can gradually loosen the connection or fatigue the conductor.

Research presented through the NFPA Research Foundation notes that loose connections may develop over time because of vibration and thermal cycling, increasing connection resistance and localized heating that can eventually lead to failure.

Quality terminals help reduce these risks by providing more consistent crimp performance and stronger mechanical retention.

Improper Installation

Even the highest-quality electrical terminal cannot compensate for improper installation.

Using the wrong wire gauge, selecting an incorrect terminal size, failing to use the proper crimping tool, or applying insufficient crimp force can all create weak electrical connections.

Likewise, over-crimping can damage both the terminal and conductor, reducing the connection's mechanical strength.

Choosing a quality terminal is only one part of building a reliable electrical connection. Following proper installation practices is equally important for achieving long-term performance.

Key Takeaway: Electrical terminal failures are rarely caused by a single issue. More often, they result from a combination of poor materials, inconsistent manufacturing, environmental exposure, vibration, and improper installation. Investing in quality terminals and using the proper installation techniques helps create electrical connections that remain reliable long after the repair is complete.


How to Identify a Failing Electrical Terminal

Electrical terminal failures rarely occur without warning. In many cases, the connection begins to deteriorate long before it stops working completely. Recognizing the early warning signs can help prevent unexpected downtime, reduce troubleshooting time, and avoid damage to surrounding electrical components.

Whether you're performing routine maintenance or diagnosing an electrical issue, inspecting your terminal connections for these common signs of failure can help you identify problems before they become costly repairs.

Excessive Heat or Discoloration

Heat is one of the earliest indicators that an electrical connection is beginning to fail. As resistance increases within the connection, electrical energy that should be flowing through the conductor is instead converted into heat.

You may notice:

  • Brown or black discoloration on the terminal
  • Melted or deformed insulation
  • Heat shrink tubing that has become brittle or distorted
  • A burnt odor near the electrical connection

While excessive heat doesn't always indicate a defective terminal, it should never be ignored. In most cases, overheating is a symptom of increased resistance caused by a loose connection, corrosion, or an improperly crimped terminal.

Corrosion Around the Connection

Corrosion is one of the most common causes of electrical connection failure, particularly in environments exposed to moisture, humidity, road salt, fertilizers, or industrial chemicals.

Inspect the terminal and surrounding wire for:

  • Green or blue copper oxidation
  • White powdery residue
  • Rust on exposed metal
  • Moisture trapped beneath insulation
  • Pitting or surface deterioration

As corrosion develops, it increases electrical resistance while reducing the amount of clean metal available to carry current. Left untreated, the connection may become intermittent or fail completely.

Loose or Intermittent Connections

Intermittent electrical problems are often among the most frustrating to diagnose because they may only occur while equipment is operating or vibrating.

Common Symptoms include:

  • Equipment that works intermittently
  • Flickering lights
  • Sensors that lose communication
  • Unexpected shutdowns
  • Blown fuses without an obvious cause

A loose terminal may continue making partial electrical contact for weeks or months before failing completely. 

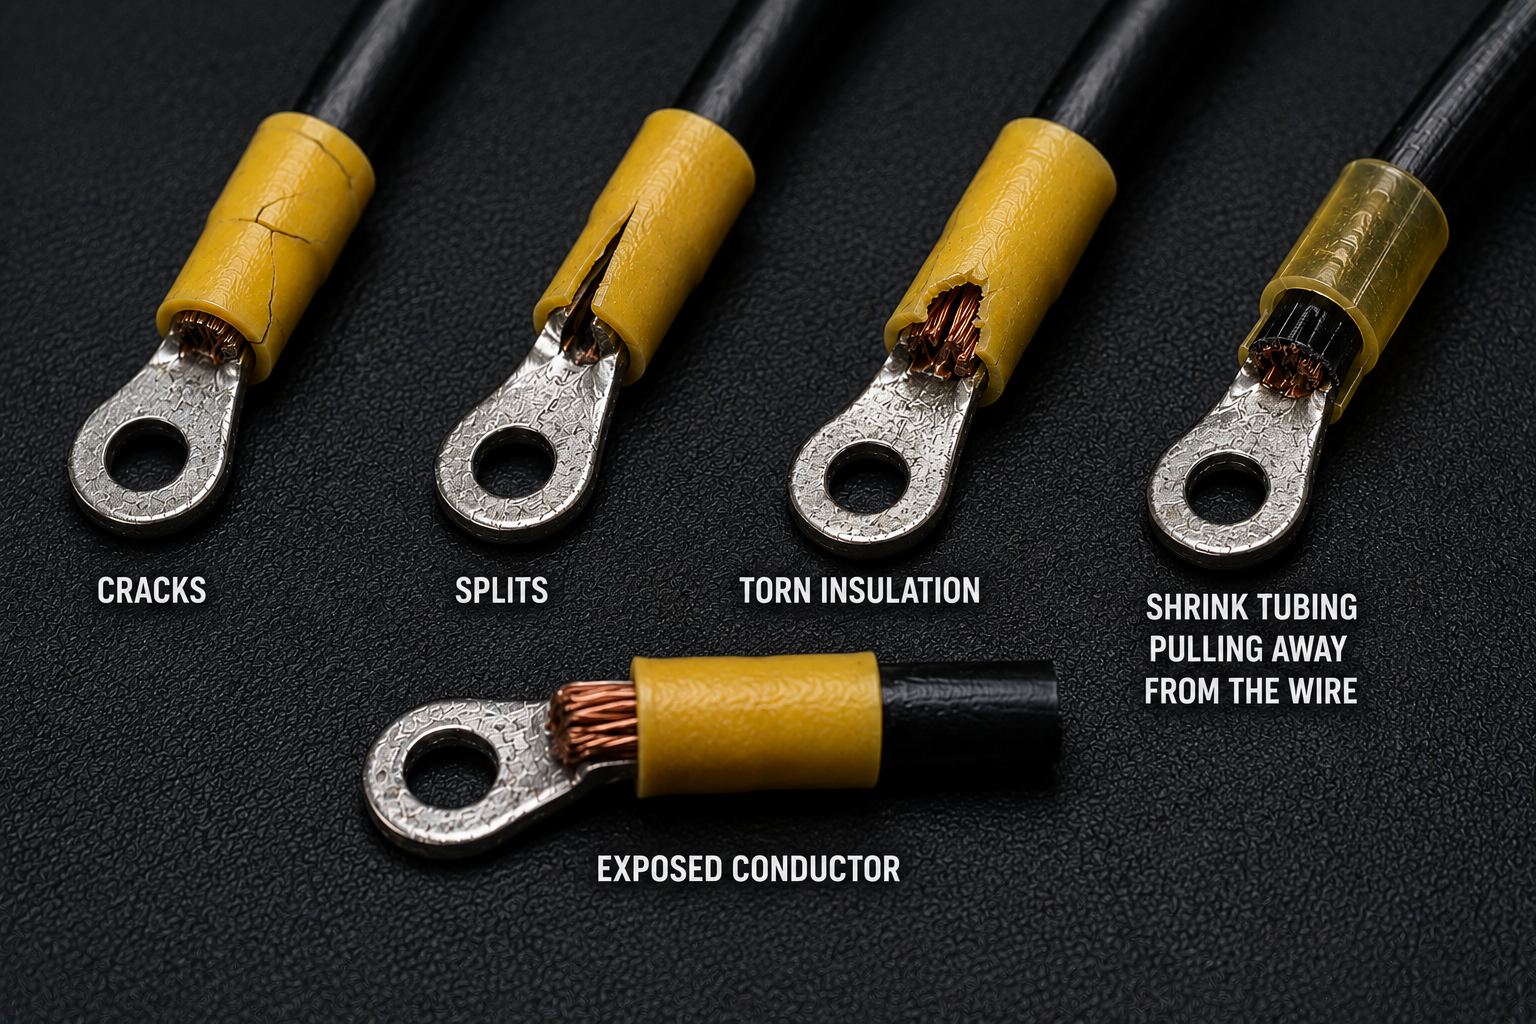
Cracked or Damaged Insulation

The insulation surrounding a terminal helps protect the electrical connection from accidental contact and environmental contamination.

Inspect insulated and heat shrink terminals for:

  • Cracks
  • Splits
  • Torn insulation
  • Shrink tubing pulling away from the wire
  • Exposed conductor

Damage to the insulation can allow moisture and contaminants to reach the crimp barrel, increasing the likelihood of corrosion and premature failure.

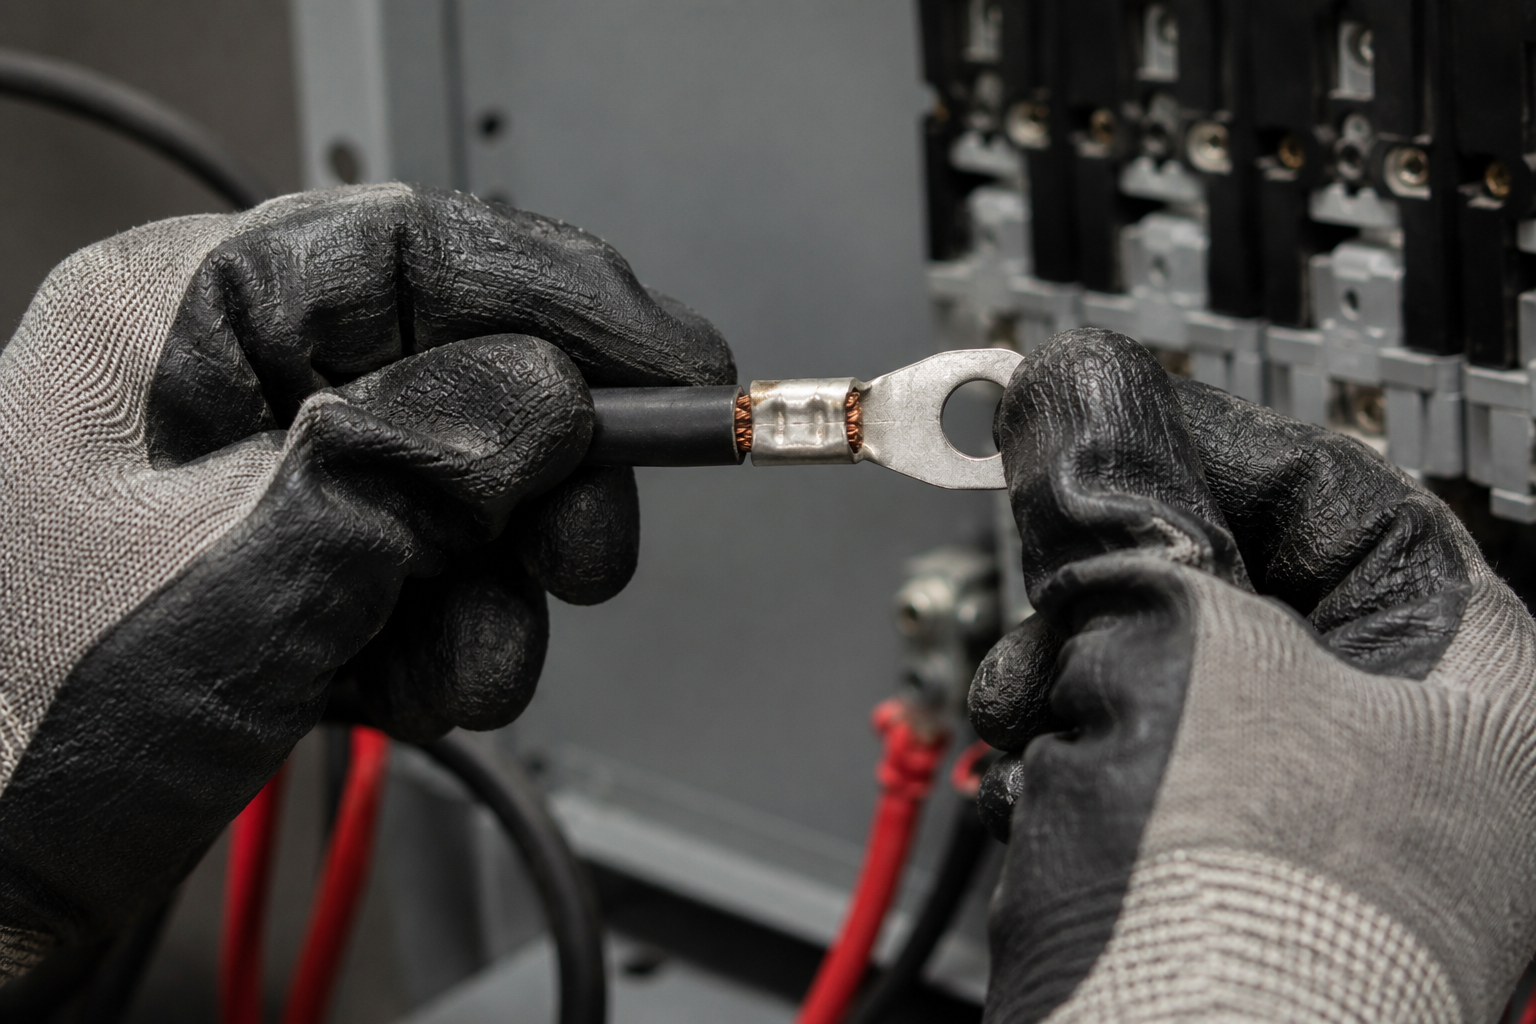
Wire Movement During Inspection

One of the simplest ways to evaluate a crimped terminal is through a careful visual and physical inspection.

With the electrical system safely de-energized, gently pull on the wire near the terminal. A properly crimped connection should remain secure with no noticeable movement between the conductor and the crimp barrel.

If the wire slides, rotates, or feels loose within the terminal, the connection should be replaced. Even slight movement can indicate a compromised crimp that may worsen over time due to vibration and thermal cycling.

Important: Always disconnect power and follow appropriate lockout/tagout procedures before inspecting or testing electrical connections.
Key Takeaway: Electrical terminal failures rarely occur without warning. Excessive heat, corrosion, loose connections, damaged insulation, and wire movement are all indicators that a terminal should be inspected or replaced. Identifying these issues early can help prevent unexpected downtime, reduce repair costs, and improve the long-term reliability of your electrical system.

Now that you know how to recognize a failing electrical terminal, the next step is understanding what separates a high-quality terminal from one that's more likely to fail. While no electrical connection is immune to wear, choosing the right materials and construction from the beginning can significantly improve long-term reliability.


What to Look for When Choosing Electrical Terminals

By now, it's clear that the hidden cost of a low-quality electrical terminal isn't measured by its purchase price. It's measured by the time spent troubleshooting intermittent electrical issues, replacing failed connections, and repairing equipment that could have remained in service with a more reliable connection.

Fortunately, many of these problems can be avoided before a terminal is ever installed. Understanding what separates a quality electrical terminal from a lower-quality alternative makes it easier to choose products that are designed to perform reliably in the environments where they'll be used.

When evaluating electrical terminals, these are the features worth looking for.

High-Quality Conductive Materials

The foundation of any electrical terminal is the metal used to carry current. Quality terminals are commonly manufactured from copper because of its excellent electrical conductivity and mechanical strength. Many are also tin-plated to help resist corrosion while maintaining consistent electrical performance in demanding environments.

Lower-quality terminals may use thinner metal or lower-grade alloys that increase electrical resistance and reduce durability over time.

When evaluating a terminal, look for:

  • Copper construction
  • Uniform tin plating
  • Consistent metal thickness
  • Smooth, burr-free edges

A well-manufactured terminal creates greater contact between the conductor and crimp barrel, helping reduce resistance while improving mechanical strength.

Durable Insulation

Insulation does more than provide color coding.

It protects the connection from accidental contact, supports the conductor during installation, and helps resist damage caused by vibration and everyday handling.

Depending on the application, quality terminals may feature:

  • Vinyl insulation
  • Nylon insulation
  • Adhesive-lined heat shrink tubing

Heat shrink terminals provide the greatest level of environmental protection by sealing the connection against moisture and contaminants after installation.

Consistent Manufacturing Quality

Even small inconsistencies during manufacturing can affect how well a terminal performs. Poorly formed crimp barrels, uneven insulation thickness, rough edges, or inconsistent dimensions make it more difficult to achieve repeatable, reliable crimps.

Quality manufacturers maintain tighter production tolerances to help ensure every terminal performs consistently.

Although these differences may not be obvious when comparing products on the shelf, they often become apparent after years of service.

Environmental Protection

Consider the environment where the electrical connection will operate before selecting a terminal.

Applications exposed to moisture, chemicals, vibration, or extreme temperatures typically require greater protection than those located inside clean, climate-controlled electrical enclosures.

For harsh environments, consider:

  • Heat shrink terminals
  • Tin-plated connectors
  • Sealed wiring systems
  • Proper strain relief

Choosing the appropriate level of protection can significantly extend the life of an electrical connection while reducing maintenance requirements.

Use the Right Installation Tools
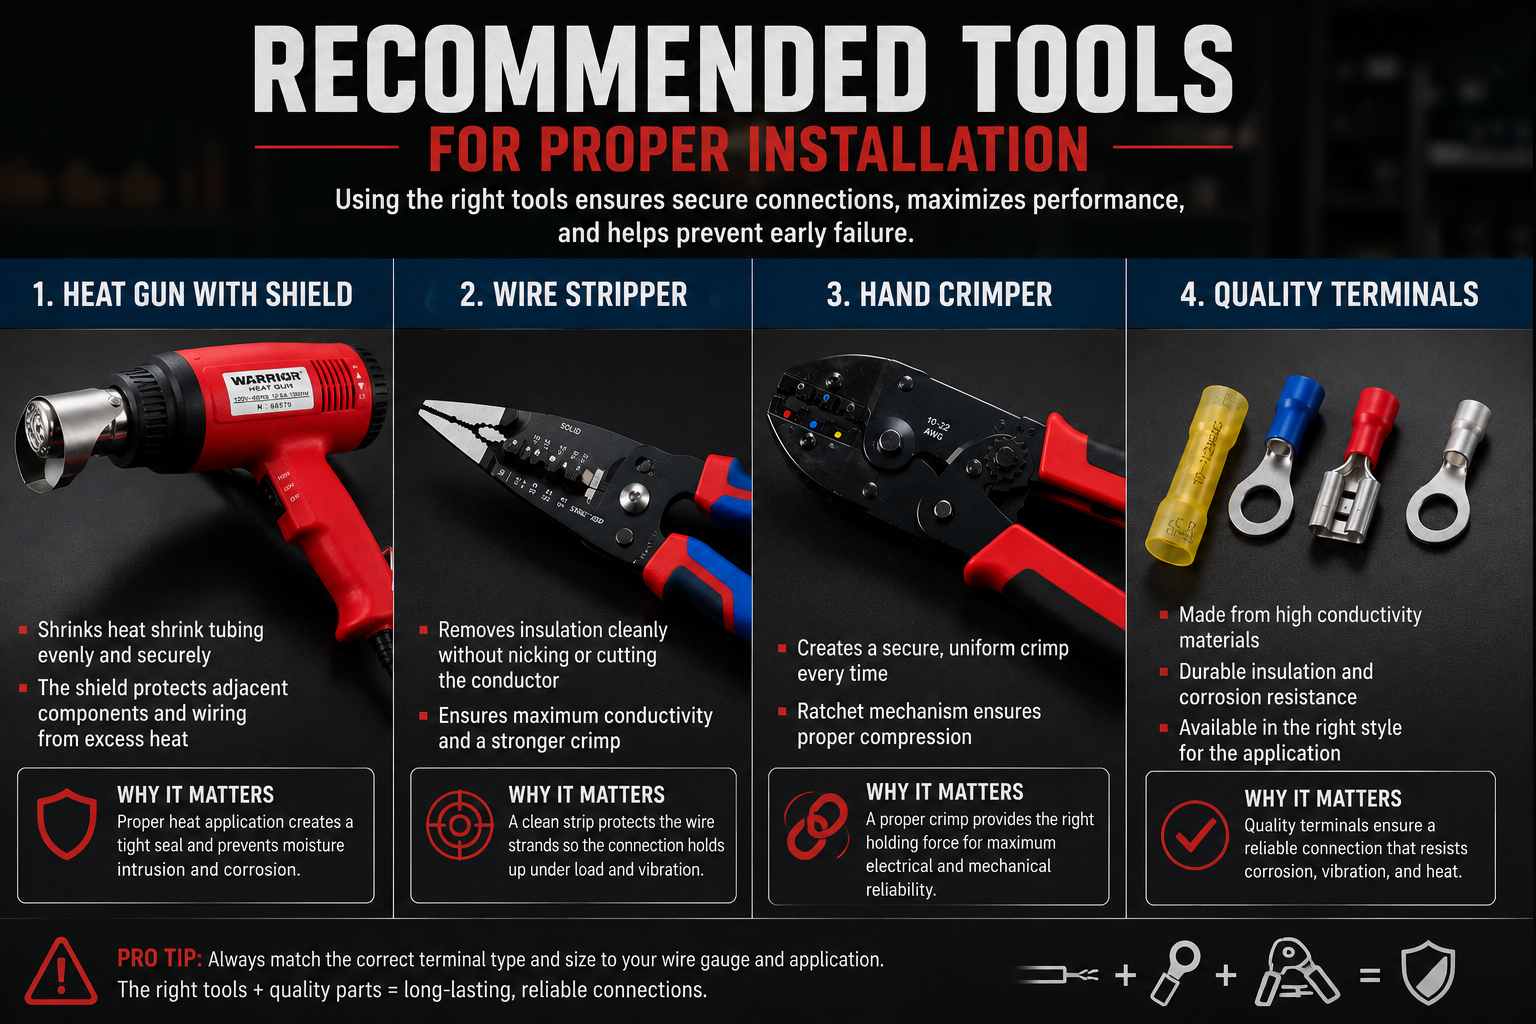
Even the highest-quality terminal can fail if it's installed using the wrong tools.

Using a crimping tool designed for the specific terminal type helps produce a secure mechanical and electrical connection. Likewise, heat shrink terminals should always be installed using a heat gun to ensure the tubing shrinks evenly and the adhesive fully seals around the wire.

Using pliers, side cutters, or other improvised tools often results in inconsistent crimps that reduce the reliability of the connection.

The National Electrical Manufacturers Association (NEMA) emphasizes that reliable electrical connections depend on using components that are installed according to the manufacturer's instructions and with compatible installation methods.


The best electrical terminal isn’t always the most expensive, it’s the one designed for the environment where it will be used.

Electrical terminals may seem like simple components, but they play a critical role in the reliability of every electrical connection. As we've covered throughout this article, not all terminals are manufactured to the same standards, and the differences in materials, insulation, construction, and environmental protection can have a significant impact on long-term performance.

Understanding what causes electrical terminals to fail, recognizing the early warning signs of a deteriorating connection, and knowing what to look for when selecting a quality terminal can help reduce unexpected downtime, improve electrical reliability, and minimize costly repairs. Choosing the right terminal for the operating environment, and installing it with the proper tools, helps ensure the connection performs as intended long after the installation is complete.

Ultimately, the hidden cost of a low-quality electrical terminal isn't reflected in its purchase price. It's measured by the maintenance, troubleshooting, and lost productivity that can result from a poor connection. By making informed decisions during product selection and installation, you can build electrical systems that are more reliable and built to last.

Don't Let a Small Connection Become a Big Problem

Browse Ram Products' selection of electrical terminals, heat shrink connectors, and installation tools to build dependable electrical connections from the start. 

Browse Electrical Terminals

What is Vendor Managed Inventory?


Imagine stopping a repair because the last electrical connector was used yesterday. 

Or realizing someone ordered another box of zip ties when five unopened boxes were already sitting on another shelf. 

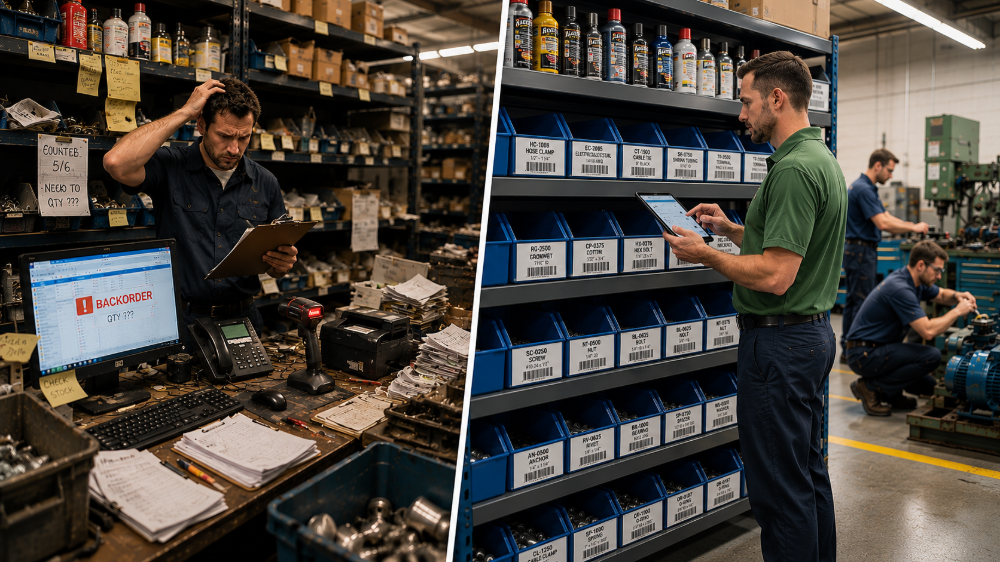
These inventory issues happen every day in maintenance shops, fleet operations, manufacturing facilities, municipalities, and service departments. Too much inventory ties up cash, while too little inventory delays repairs and frustrates technicians. 

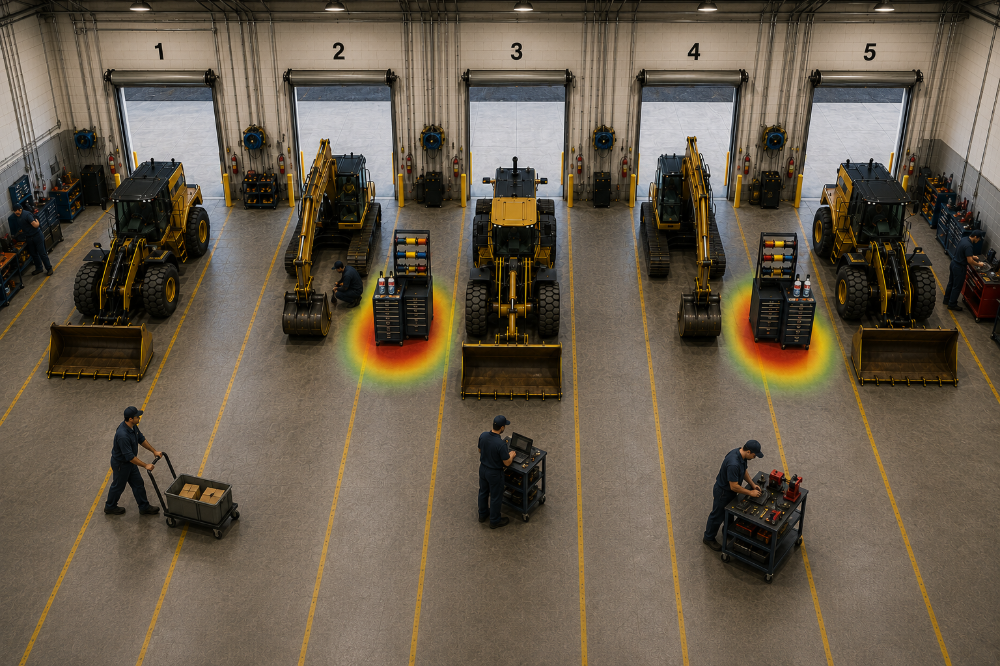
Vendor Managed Inventory (VMI) solves this challenge by allowing a trusted supplier to monitor, replenish, and optimize your inventory, so your team always has the products they need, without spending valuable time managing stock. 

In this guide, you'll learn: 

  • What Vendor Managed Inventory is  
  • How the process works  
  • Benefits for MRO operations  
  • Common misconceptions  
  • Whether VMI is right for your business 


What is Vendor Managed Inventory?

If you've ever had a technician stop work because an essential part wasn't available, or discovered shelves filled with products that haven't been used in months, you've experienced the challenges of inventory management. Vendor Managed Inventory (VMI) is designed to solve those problems by shifting the responsibility of monitoring and replenishing inventory from the customer to a trusted supplier. 

Vendor Managed Inventory (VMI) is an inventory management system in which a supplier monitors inventory levels at a customer's location and replenishes products based on agreed-upon minimum and maximum stock levels. Rather than waiting for someone on your team to notice low inventory and place an order, the supplier proactively ensures the right products are available when they're needed. 

In a traditional inventory system, employees are responsible for checking shelves, counting inventory, identifying products that need to be reordered, creating purchase orders, and tracking deliveries. These tasks consume valuable time and can easily be overlooked during busy periods, leading to stockouts or excess inventory. 

With a Vendor Managed Inventory program, many of these routine inventory responsibilities are handled by the supplier. Through scheduled inventory reviews, usage monitoring, and planned replenishment, the supplier helps maintain appropriate inventory levels while reducing the administrative burden on your team. 

Vendor Managed Inventory is commonly used to manage frequently consumed MRO products, including:  
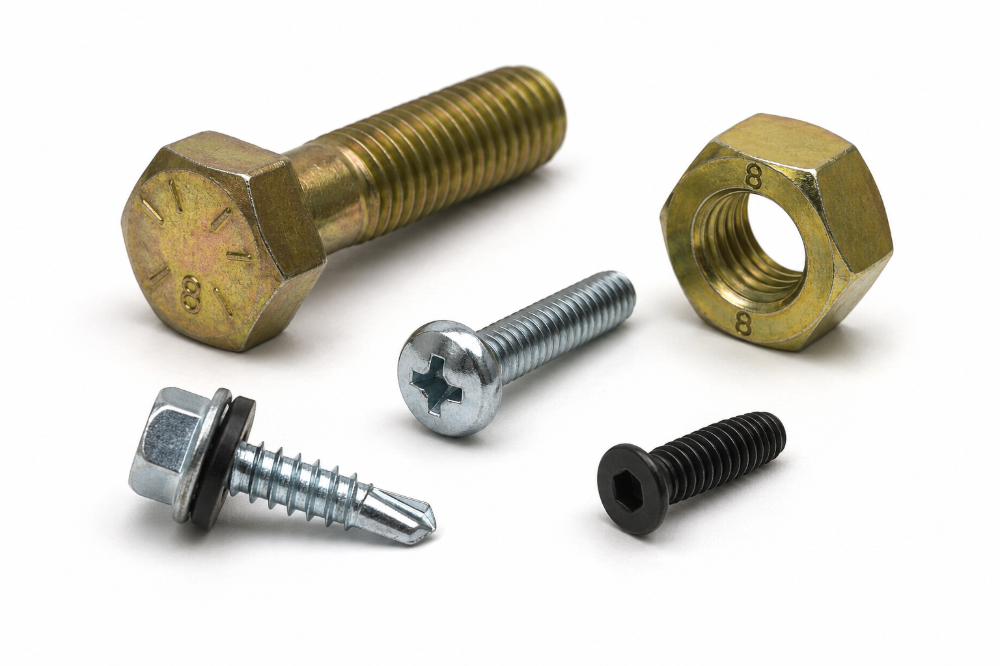
  • Fasteners 
  • Electrical supplies and connectors  
  • Abrasives  
  • Industrial chemicals  
  • Personal protective equipment (PPE) and safety products  
  • Shop supplies  
  • Fleet maintenance products  
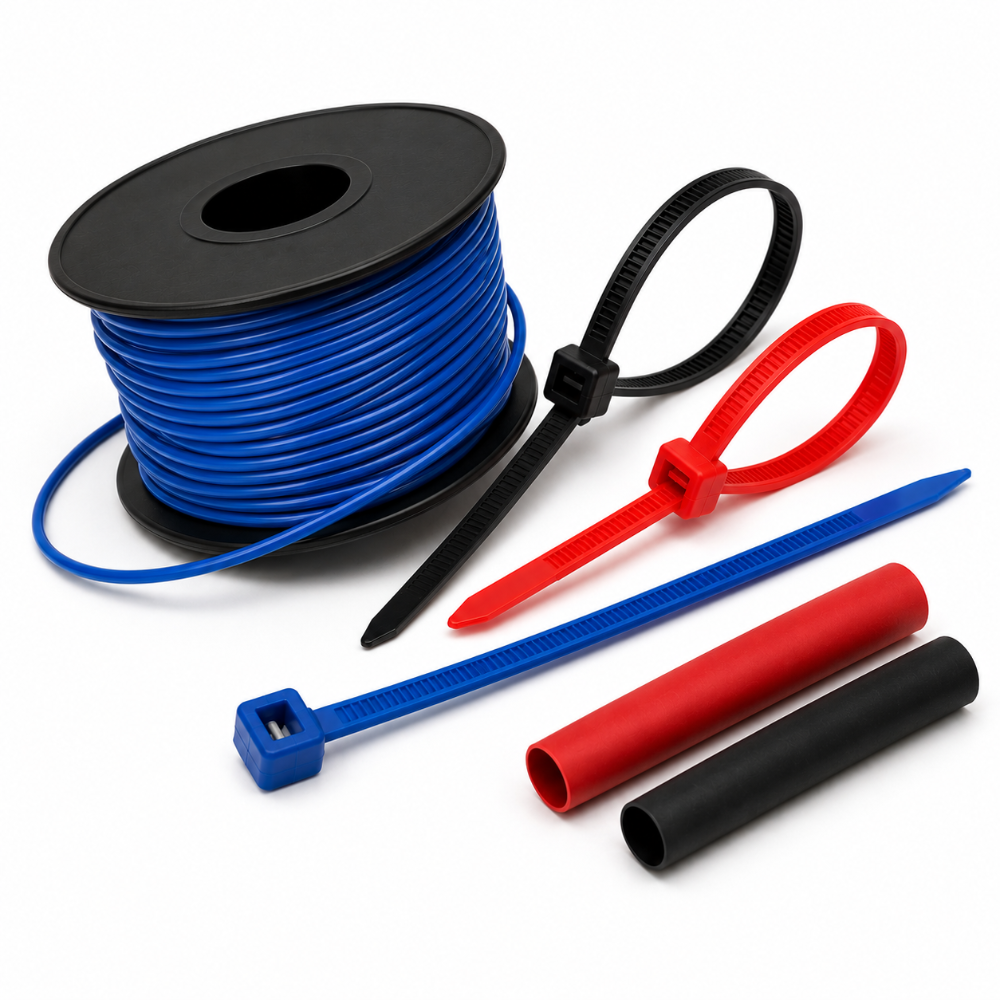
  • Wire, cable ties, and heat shrink tubing  

 Because these products are used every day, maintaining consistent inventory levels helps reduce downtime, improve productivity, and ensure technicians have the materials they need to keep operations running efficiently. 
 

How Vendor Managed Inventory Works

While every Vendor Managed Inventory (VMI) program is tailored to the customer's specific needs, most follow a similar process. The goal is to ensure critical inventory is available when it's needed while reducing excess stock and minimizing the time your team spends managing inventory. 

Here's what a typical Vendor Managed Inventory program looks like: 


Inventory Assessment

Every successful VMI program starts with understanding your operation. Before inventory levels are established, the supplier evaluates your current inventory practices, purchasing patterns, and operational needs. 

During this assessment, they typically review: 

  • Product usage and consumption rates  
  • Frequently used or mission-critical items  
  • Current inventory storage and organization  
  • Purchasing history and order frequency  
  • Opportunities to eliminate duplicate or obsolete inventory  

 This information helps create a customized inventory strategy rather than relying on a one-size-fits-all approach. For example, a fleet maintenance shop may use electrical connectors, cable ties, and heat shrink tubing daily, while a manufacturing facility may consume large quantities of abrasives, fasteners, and industrial chemicals. Understanding these differences allows the inventory program to be tailored to each customer's operation. 


Establish Minimum and Maximum Inventory Levels

Once inventory usage has been evaluated, the supplier works with your team to establish minimum and maximum stock levels for each product. 

The minimum level represents the point at which inventory should be replenished before a shortage occurs. The maximum level prevents unnecessary overstocking and helps keep inventory investment under control. 

For example: 

ProductMinimum InventoryMaximum Inventory

Electrical Connectors

3 Bags8 Bags
Cable Ties10 Bags20 Bags
Safety Glasses2 Cases6 Cases

These inventory levels aren't permanent. As product usage changes due to seasonal demand, new projects, or changes in production, minimum and maximum quantities can be adjusted to better reflect your actual needs.


Routine Inventory Lists

Rather than waiting for someone to place an order, the supplier conducts scheduled inventory reviews to monitor stock levels and replenish products as needed. 

Depending on your operation and product usage, these visits may occur: 

  • Weekly  
  • Bi-weekly  
  • Monthly  
  • Or on another schedule that best supports your business

During each visit, the supplier checks inventory levels, verifies that products remain organized, identifies items approaching their minimum quantities, and notes any changes in usage patterns. This proactive approach helps prevent stockouts before they disrupt operations. 


Inventory Replenishment

After reviewing inventory, the supplier replenishes products that have fallen below their established minimum levels. Instead of ordering based on estimates or emergency requests, replenishment is driven by actual inventory usage. 

This means your technicians are more likely to have the supplies they need when they need them—without tying up valuable cash in excessive inventory. It also reduces last-minute purchasing, expedited shipping costs, and unexpected downtime caused by missing materials. 


Reporting and Continuous Improvement

A Vendor Managed Inventory program doesn't end once products are restocked. Ongoing reporting provides valuable insight into how your inventory is being used and where improvements can be made. 

Depending on the program, reporting may include: 

  • Inventory usage trends  
  • Product consumption by category  
  • Slow-moving or obsolete inventory  
  • Opportunities to standardize products  
  • Recommendations for reducing inventory costs  

These reports help businesses make informed purchasing decisions while continuously optimizing their inventory over time. 


Benefits of Vendor Managed Inventory

A well-managed Vendor Managed Inventory (VMI) program offers more than just stocked shelves. It helps streamline inventory management, reduce administrative work, and ensure your team has the products they need to keep operations running efficiently. 

Whether you manage a fleet maintenance facility, manufacturing plant, or repair shop, the right VMI program can improve daily operations while helping control inventory costs. 


Reduced Stockouts

One of the biggest advantages of Vendor Managed Inventory is reducing the risk of stockouts. 

Running out of a commonly used item, whether it's electrical connectors, fasteners, abrasives, or safety equipment, can bring work to a halt. Even inexpensive consumables can delay repairs, slow production, and create unnecessary frustration for technicians. 

With a VMI program, inventory is monitored regularly and replenished before critical products run out. Instead of reacting to shortages, your business can take a proactive approach that keeps essential supplies available when they're needed. 

For maintenance teams, that means fewer interruptions and more time spent completing repairs instead of waiting for parts to arrive. 


Save Time On Inventory Management

Managing inventory requires more time than many businesses realize. 

Employees often spend hours: 

  • Counting bins and shelves  
  • Identifying products that need to be reordered  
  • Creating purchase orders  
  • Following up on deliveries  
  • Searching for missing inventory  
  • Chasing backorders  

These routine tasks pull technicians, supervisors, and purchasing personnel away from more valuable work. 

Vendor Managed Inventory shifts much of this responsibility to your supplier. Through scheduled inventory reviews and planned replenishment, your team spends less time managing inventory and more time maintaining equipment, serving customers, or completing projects. 


Improve Cash Flow by Reducing Excess Inventory

Buying too much inventory can be just as costly as not having enough. 

Excess stock ties up capital, takes up valuable storage space, and increases the likelihood of products becoming obsolete before they're ever used. Over time, these hidden costs can have a significant impact on your operating budget. 

A Vendor Managed Inventory program helps maintain inventory levels based on actual product usage rather than estimates or "just in case" ordering. By establishing agreed-upon minimum and maximum quantities, businesses can carry enough inventory to support operations without investing in unnecessary stock. 

The result is better cash flow, lower carrying costs, and inventory that better reflects your day-to-day operational needs. 


Gain Better Visibility into Inventory Usage

Many businesses know what they purchase, but not necessarily what they use. 

Without clear visibility into inventory consumption, it's difficult to identify purchasing trends, adjust inventory levels, or recognize products that rarely leave the shelf. 

Vendor Managed Inventory provides greater insight into your inventory by helping you understand: 

  • Which products are used most frequently  
  • Which items move slowly  
  • Where inventory is increasing or decreasing  
  • Which products may no longer need to be stocked  
  • Opportunities to standardize commonly used items  

This visibility allows businesses to make more informed purchasing decisions while continuously improving inventory efficiency over time. 


Increase Productivity Across Your Operation

Every minute spent looking for parts, counting inventory, or placing orders is time that isn't spent performing maintenance or completing customer work. 

When technicians have immediate access to the supplies they need, work moves more efficiently. Repairs are completed faster, downtime is reduced, and employees can stay focused on the tasks that create value for the business. 

Instead of searching multiple storage locations or discovering missing inventory halfway through a repair, technicians can trust that commonly used MRO products are available when they need them. 

Over time, these small improvements in efficiency can add up to significant productivity gains across an entire operation. 


Build a Stronger Supplier Partnership

Vendor Managed Inventory changes the relationship between a business and its supplier. 

Instead of simply placing orders when products run low, businesses work alongside a supplier that actively helps manage inventory, monitor usage, and identify opportunities for improvement. 

A trusted VMI partner can help: 

  • Optimize inventory levels  
  • Identify changing product usage trends  
  • Recommend alternative products when appropriate  
  • Eliminate obsolete or duplicate inventory  
  • Improve inventory organization  
  • Support long-term inventory planning  

This collaborative approach creates ongoing communication and helps ensure your inventory strategy evolves as your business changes. 

Rather than acting solely as a distributor, your supplier becomes an extension of your team, working to improve efficiency, reduce waste, and keep your operation supplied with the products needed to stay productive. 


Common Misconceptions About Vendor Managed Inventory

Vendor Managed Inventory (VMI) is a proven inventory management strategy, but there are still several misconceptions that can prevent businesses from exploring its benefits. Here are some of the most common concerns—and the reality behind them. 


"I'll Lose Control of My Inventory." 

A common misconception is that implementing VMI means giving your supplier complete control over your inventory.

In reality, your business remains in control. You work with your supplier to determine which products are managed, establish minimum and maximum inventory levels, and define the replenishment schedule. The supplier simply helps execute the plan and provides recommendations based on inventory usage.


"It's Only for Large Companies." 

While large manufacturers often use Vendor Managed Inventory, businesses of all sizes can benefit from it. Fleet maintenance shops, municipalities, contractors, and repair facilities all rely on critical MRO supplies to keep operations running. VMI can be scaled to fit the size and needs of nearly any operation.


"It Limits Flexibility." 

Some businesses worry that inventory levels become fixed once a VMI program is established. Inventory requirements change over time, and a good VMI program adapts with them. As demand shifts due to seasonal workloads, new projects, or changing product usage, inventory levels can be adjusted to match your current needs.

"Vendor Managed Inventory Will Cost More." 

Although it may seem like an added expense, VMI often helps reduce overall inventory costs. By preventing emergency purchases, minimizing excess inventory, reducing administrative labor, and avoiding downtime caused by stockouts, many businesses realize significant long-term savings.

The bottom line: Vendor Managed Inventory isn't about giving up control—it's about gaining a smarter, more proactive approach to inventory management that helps keep your operation running efficiently. 


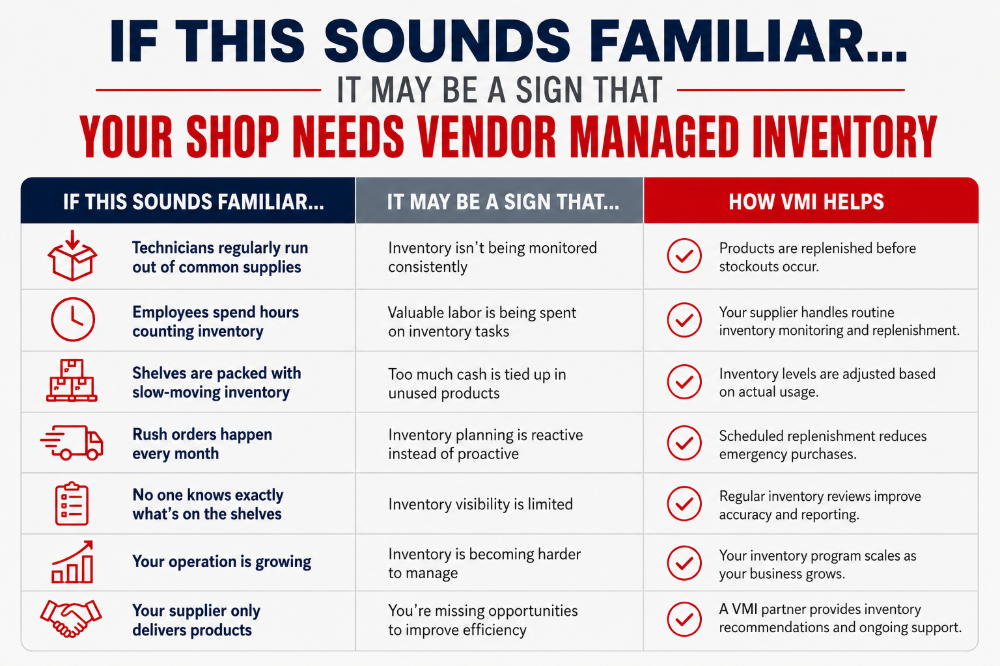
Signs Your Shop is Ready For VMI

Bottom Line: If you checked two or more of these boxes, it may be time to explore a Vendor Managed Inventory program. 


Why Choose Ram Products' VMI Service

Ram Products partners with customers to simplify inventory management through tailored Vendor Managed Inventory solutions. Rather than offering a one-size-fits-all approach, the program is designed around each customer's inventory usage, operational needs, and replenishment schedule. 

Depending on your operation, Ram Products can: 

  • Evaluate current inventory practices  
  • Establish appropriate minimum and maximum inventory levels  
  • Monitor inventory through scheduled service visits  
  • Replenish products before shortages occur  
  • Help reduce excess inventory and improve organization  
  • Provide feedback that supports informed purchasing decisions  

Whether you manage a fleet maintenance facility, manufacturing operation, municipality, or service shop, Ram Products works alongside your team to help keep critical MRO supplies available while reducing the time spent managing inventory, all at no cost to you.  

Vendor Managed Inventory isn't simply about keeping shelves stocked—it's about improving efficiency, reducing downtime, and giving maintenance teams more time to focus on the work that keeps operations running. By partnering with a trusted supplier to manage inventory, organizations can reduce stockouts, improve visibility, and streamline purchasing. 

If you're looking for a smarter way to manage MRO inventory, Ram Products' Vendor Managed Inventory service can help you build a program tailored to your operation. 

Ready to simplify your inventory management? 

Explore Ram Products' Vendor Managed Inventory service to learn how a customized VMI program can help your operation reduce downtime, improve inventory visibility, and keep critical supplies on hand. 

DAP Black Spray Foam and Spray Foam Guns
DAP products are professional-grade and trusted since 1865. Ram Products is a proud distributor of DAP, bringing these exceptional products directly to you, our customers.
Anti-Seize Lubricants: Preventing Equipment Seizure and Corrosion
At Ram Products, we’re here to help you make informed decisions that keep your equipment running smoothly and efficiently. This guide is designed to help you understand the basics of anti-seize compounds and choose the right product for your operations.
Gasket Makers & Sealants: Ensuring Leak-Proof Repairs
When you’re knee-deep in an engine repair or handling an urgent machinery fix, finding the perfect seal can make or break the job. That’s where a gasket maker shines — offering flexibility, reliability, and convenience that traditional gaskets often can’t match. Understanding the nuances of gasket makers can save you time, money, and headaches.
Vega Tools - Bit Ratchet Sets & Bolt & Screw Extractor Sets
Vega products are known for their exceptional quality, innovation, and reliability across a wide range of applications. Ram Products is proud to be a trusted distributor of Vega, delivering top-tier solutions that our customers can count on.
Industrial Vending Machines: Boosting MRO Efficiency On-Site
As a trusted provider and servicer of industrial vending machines, our experts are here to help you choose the right solution to streamline costs and optimize your inventory control. Let’s start with definitions, benefits, and use cases.
Alfa Tools Quality Precision Cutting Tools
Alfa Tools has provided quality precision cutting tools for a wide range of materials since 1977. Their premium cutting tools are designed with advanced characteristics like special coatings for improved performance and the versatility to work on flat or curved surfaces. Ram Products is now a proud supplier of these quality precision cutting tools, equipped with superior design, functionalities, and craftsmanship.